The default Cpk – Process Capability report does not show any Factor values, but it is possible to add those values into the template starting with revision 3.4.88. This document gives step-by-step directions for inserting a Text Factor into the default Cpk – Process Capability Mulitple Plots template.
Designing the Template
In order to add a Factor value to the report, the Report Designer must be used. These are the general steps for getting into the Report Designer to modify the template for the Cpk – Process Capability Multiple Plots report.
- From QC-CALC SPC choose the Report – Cpk – Process Capability menu.
- Choose the dimensions and click OK.
- On the next screen that shows the 2 graphs, click the Print button.
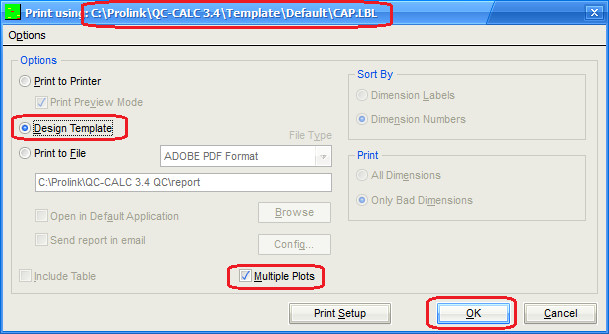
- The next screen is the Print using screen. Verify the template location at the top of the screen is the template you want to edit (use the Options – Select Templates menu to change the template location or the Options – Copy Templates menu to move a copy of the template to a different location) and make sure the Multiple Plots check box is checked, then choose Design Template and click OK.
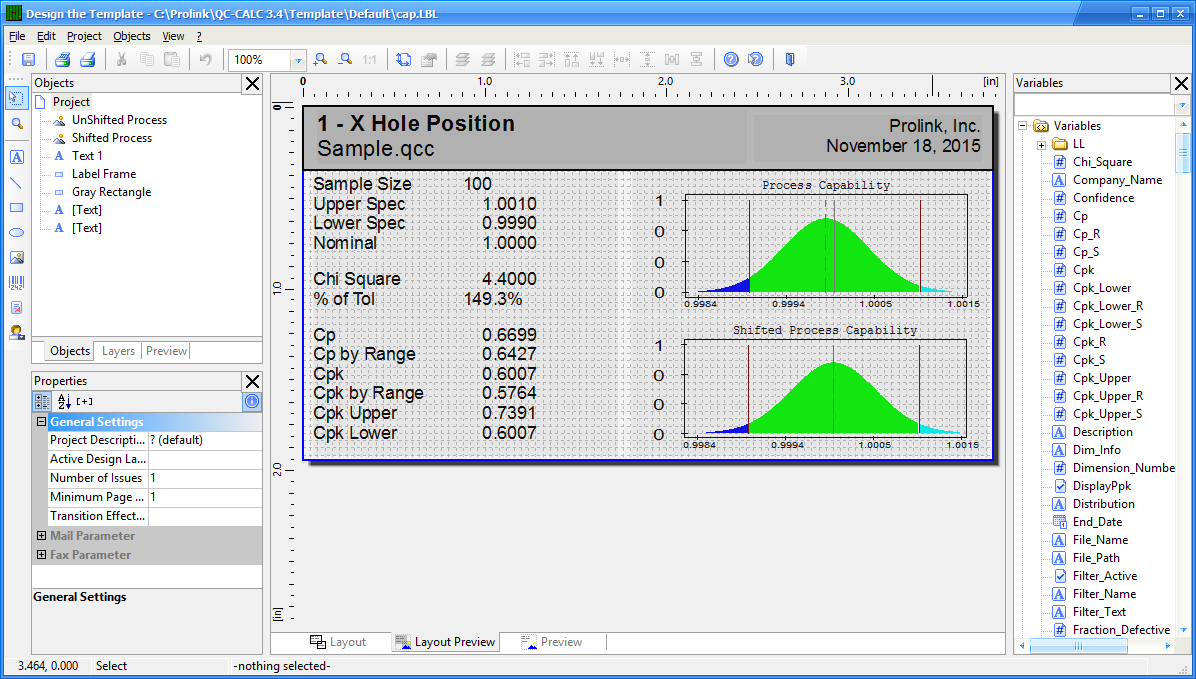
- The Report Designer now appears on the screen.
Adding Cpk to the Calculation Box
These directions will add Text Factor 1 to the box that contains the calculations.
- In the Objects panel in the upper left corner, double click on the “Text 1” item. Note: You can also double click on the item on the right side of the screen and accomplish the same thing.
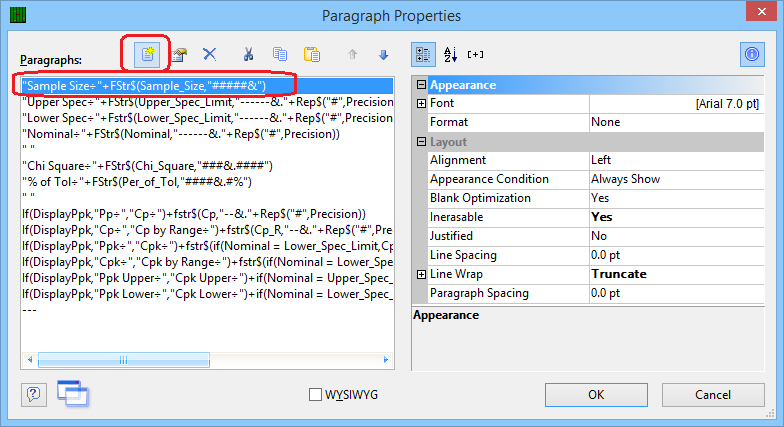
- The Paragraph Properties window is now displayed. Highlight the line you would like to have below the Text Factor line we are going to add and click the Insert a Paragraph button.
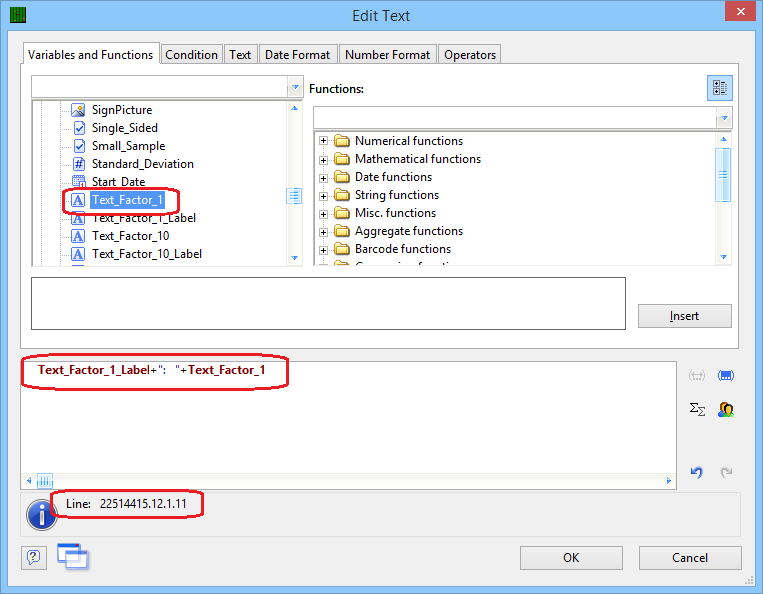
- In the Edit Text window that appears, expand the Variables list in the Variables and Functions tab then scroll down and highlight the “Text_Factor_1_Label” item.
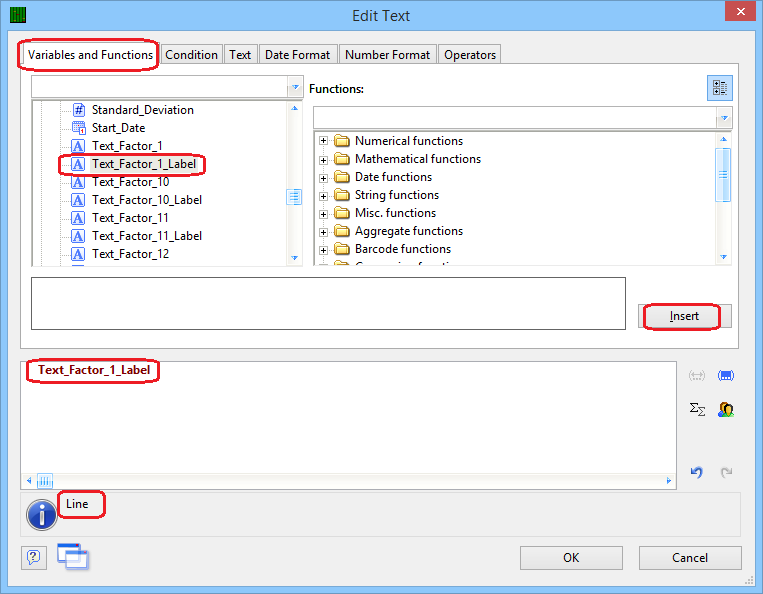
- Now click the Insert button and you’ll see the “Text_Factor_1_Label” item shown in the bottom window along with the actual value of the label displayed next to the blue “i" below the box.
- Next we want to put a colon and spaces between the label and the value, so after the “Text_Factor_1_Label” item in the bottom window, type: +”: “+ (a few spaces between the : and the end “).
- Now go back to the Variables list and highlight the “Text_Factor_1” item and click the Insert button. At this point the error you were seeing next to the blue “i" will be cleared and you will see the name of your Text Factor 1 column along with a value from that column.
- When you look at the “Text 1” area of the Layout Preview screen you should now see the new line in the box. Make sure that all lines are still visible. You may need to stretch the window to get enough room for all lines to show or you may need to decrease the font of some items.
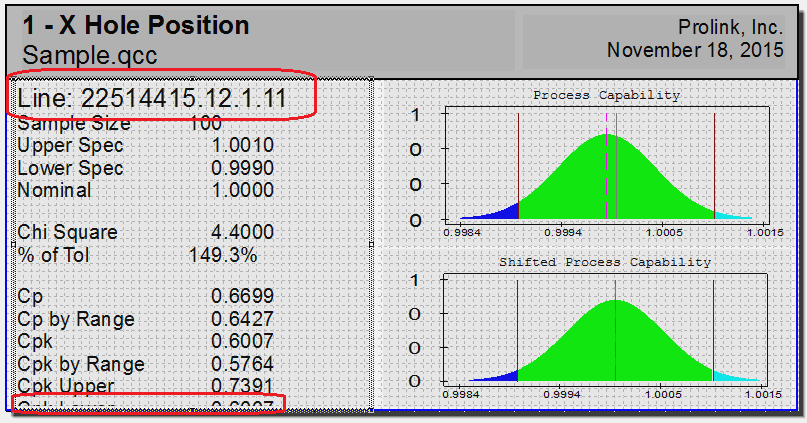
- In this case we will need to decrease the font of the line we just added and also decrease the font of the 2 blank lines in order to get the “Cpk Lower” line to appear at the bottom.
- Double-click on the Text 1 box to bring up the Paragraph Properties window again. Highlight the new line (“Text_Factor_1_Label+ …”) and change the Font to Default = “No”, then type “7” into the Size box. This will make that line match all the other lines.
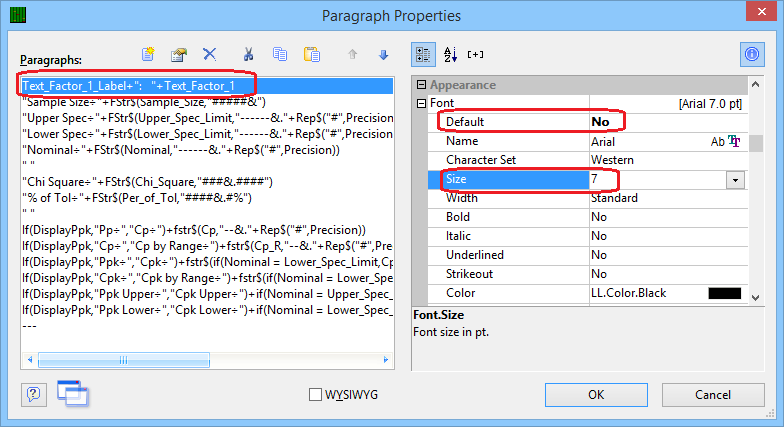
- That helped a little, but the Cpk Lower value still isn’t fully visible. In this case we’re going to decrease the font of both blank lines at the same time.
- Back in the Paragraph Properties box, highlight both lines that just show “ “ without any words. Use the CTRL key to click and get only those 2 lines highlighted. Now change the Size item for both lines by typing a “3” into that box.
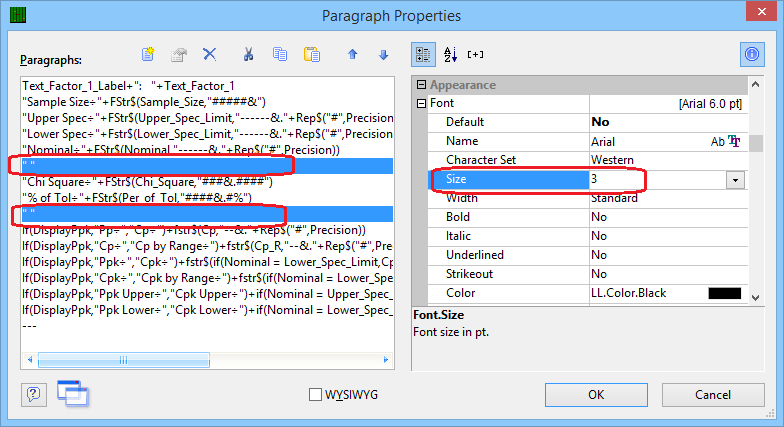
- Now when you click OK you should see the “Cpk Lower” line clearly.
- Click File – Save, then File – Exit to get out of the Report Designer and run your report to see how it looks.