Part file performance decreases over time as the record count increases. If you have part files with many thousands of records and don't need the oldest data, you can archive it using our Enterprise Data Loader (EDL) software. Archiving the data will move it from your main QC-CALC database into a secondary archive database. The steps below go over how to set up an Archive Event in EDL to archive your part data.
- Download and install EDL 4.2: https://www.prolinksoftware.com/download.aspx?product_id=668
- Activate your license by going to the Help > License Configuration menu. You can also run in full evaluation mode for 15 days.
- Open EDL by running as Administrator (required to start and stop the EDLLoadService Windows Service)
- Confirm the EDLLoadService Service is running: check Tools > Start Load Service. If this is grayed out, the service is running. If it is not grayed out, select it to start the service.
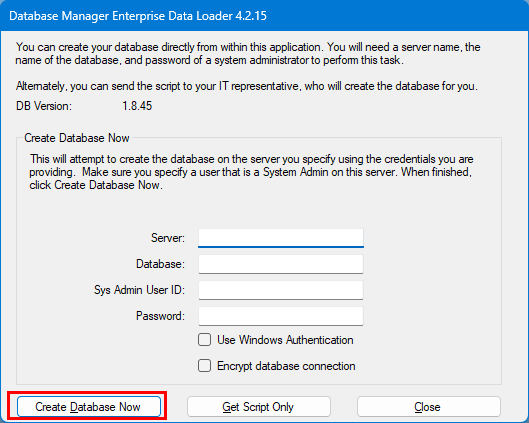
- Go to Help > Create Database to create the archive database where your archived data will be stored.
- Enter your SQL Server connection information and a name for the archive database. Select the Create Database Now button to create the new database. Select the Close button when finished.
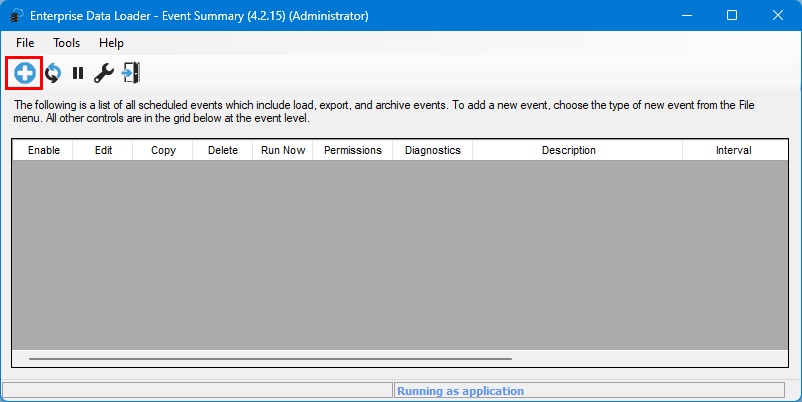
- In EDL, click the blue Plus button to add a new Event.
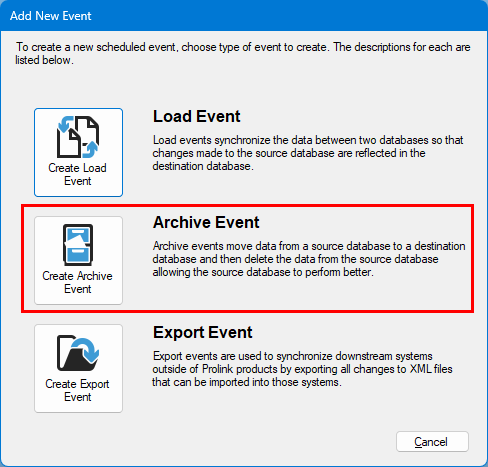
- Next, select the Create Archive Event button.
- In the Archive Event Details Wizard, give the Archive Event a name, select an Archive Option, and then set the Source and Destination Types.
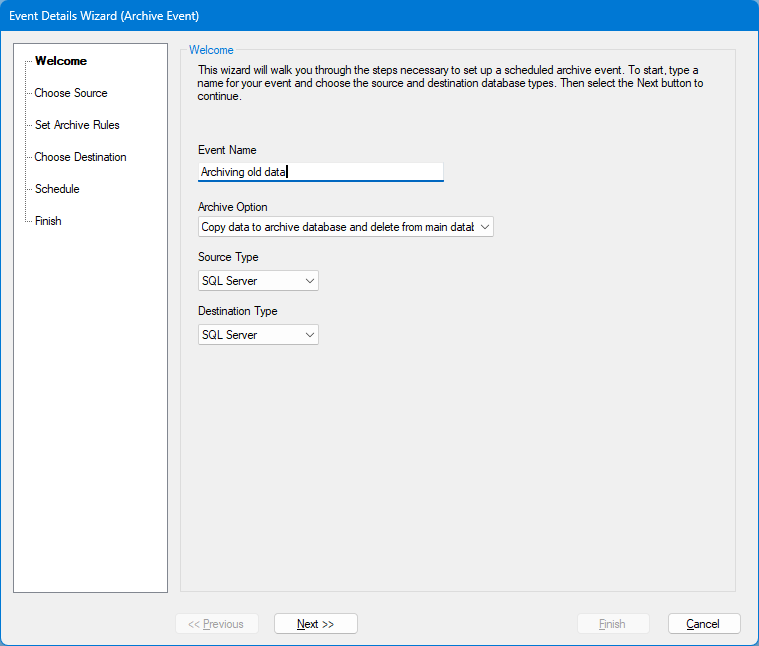
If you want to archive data from your main QC-CALC database into a second archive database, choose SQL Server as both the Source Type and Destination Type. You will be asked to enter the SQL server connection information later.
You have 3 archiving options. if you want to archive data into a second database and remove it from the first database, choose option 1. The options are briefly discussed below:
- 1 - Copy data to archive database and delete from main database
- If you want to archive old data into another database to trim your part files, choose this option
- 2 - Delete from main database only
- This simply deletes data from the main database, nothing is archived.
- 3 - Set part file inactive if no activity
- This will mark part files as "inactive" if they haven't had recent activity. Inactive files do not appear when opening files from the File > Open menu in QC-CALC.
- Click the Next >> button when finished on the Welcome screen. On the Choose Source screen, enter the SQL Server information for the Source database, this is where the data will be moved from. Click the Next >> button when finished.
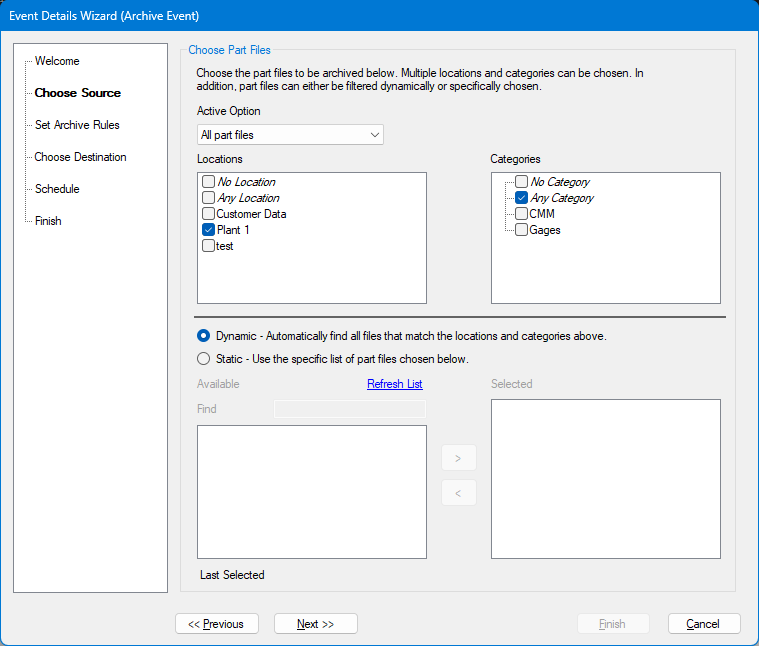
- On the next screen, choose which part files to archive.
If you want to archive old data in any part files, choose Dynamic. If you only want to archive specific part files, choose Static.
You can also restrict the archive event to specific Locations or Categories by choosing one or more Locations or Categories along with the Dynamic option. Click the Next >> button when finished.
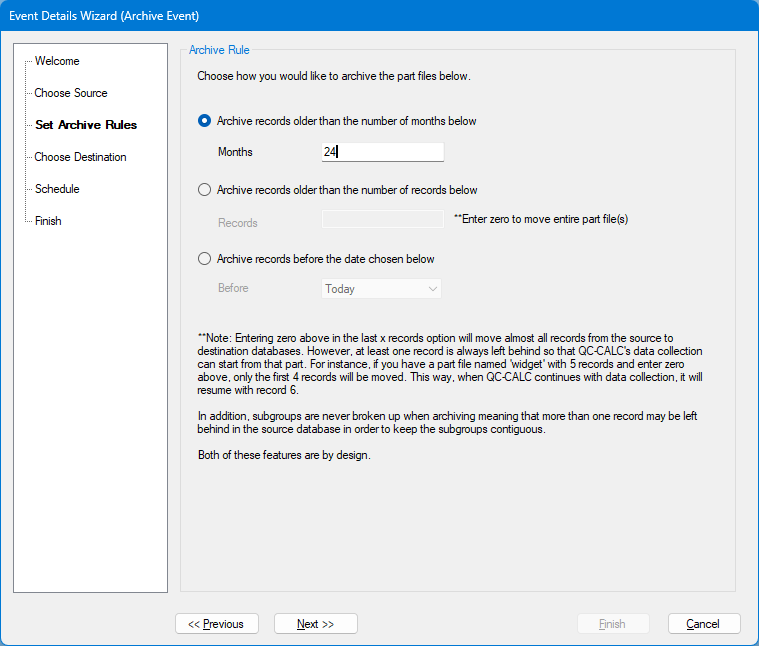
- On the Set Archive Rules screen, select the rules for archiving data in your part files. Click the Next >> button when finished.
- If you want to archive, for example, the oldest 1000 records in a part file:
- Select "Archive records older than the number of records below" and enter "1000" for Records.
- If you want to archive all records in all files older than some amount of months:
- Select "Archive records older than the number of months below" and enter a number for Months.
- If you want to archive all records before a specific date:
- Select "Archive records before the date chosen below" and select a date for Before.
- On the Choose Destination screen, enter the SQL database connection information for the archive database that was created in the beginning of this article. Click the Next >> button when finished.
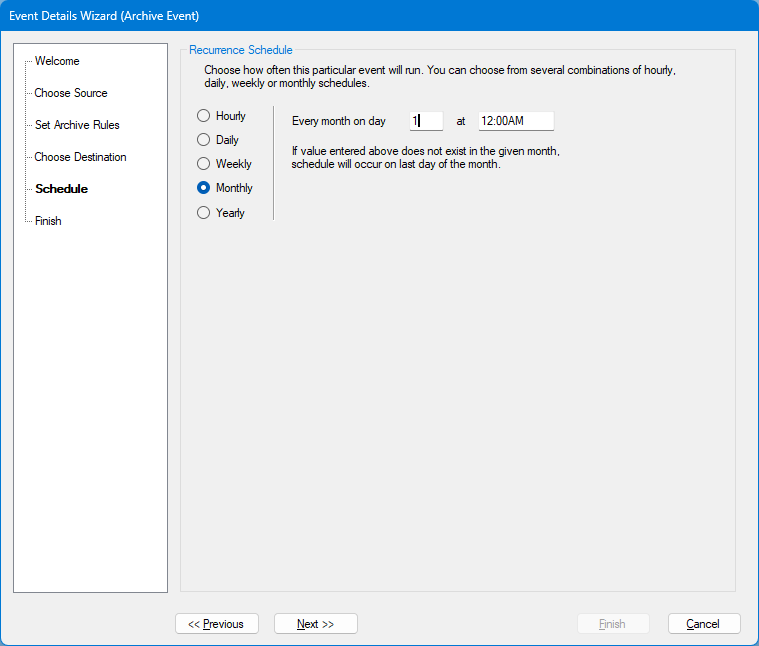
- On the Schedule screen, choose how often to run the Archive event. Click the Next >> button when finished.
- On the Finish screen, click the Enable Event check box and then select the Finish button to save the Archive Event.
- In the main EDL window you can click Run Now to run the event right now or wait until the next scheduled time which is displayed in the Next Run column.