Description
This goes through the simple set up of Marposs Ready2Gauge software so that measurements can be exported to QC-Gage for data collection. Prerequisites include Marposs Ready2Gauge and QC-Gage.
Set Up Marposs Ready2Gauge Software
Start by downloading the Ready2Gauge software from Marposs's website.
https://www.marposs.com/eng/product/wireless-handle-with-color-screen
On the Download tab of the website, choose Ready2Gauge in the Software section. There is a video tutorial on the same screen just below that will help with pairing the Bluetooth receiver and wireless handle.
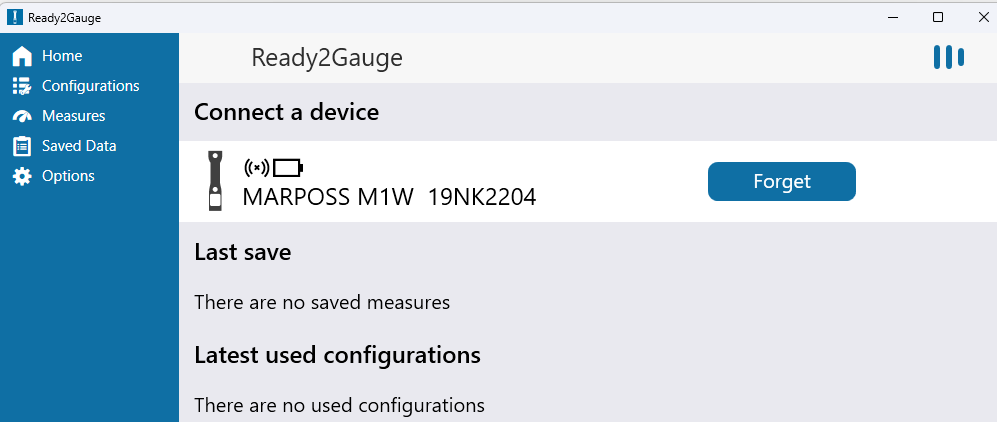
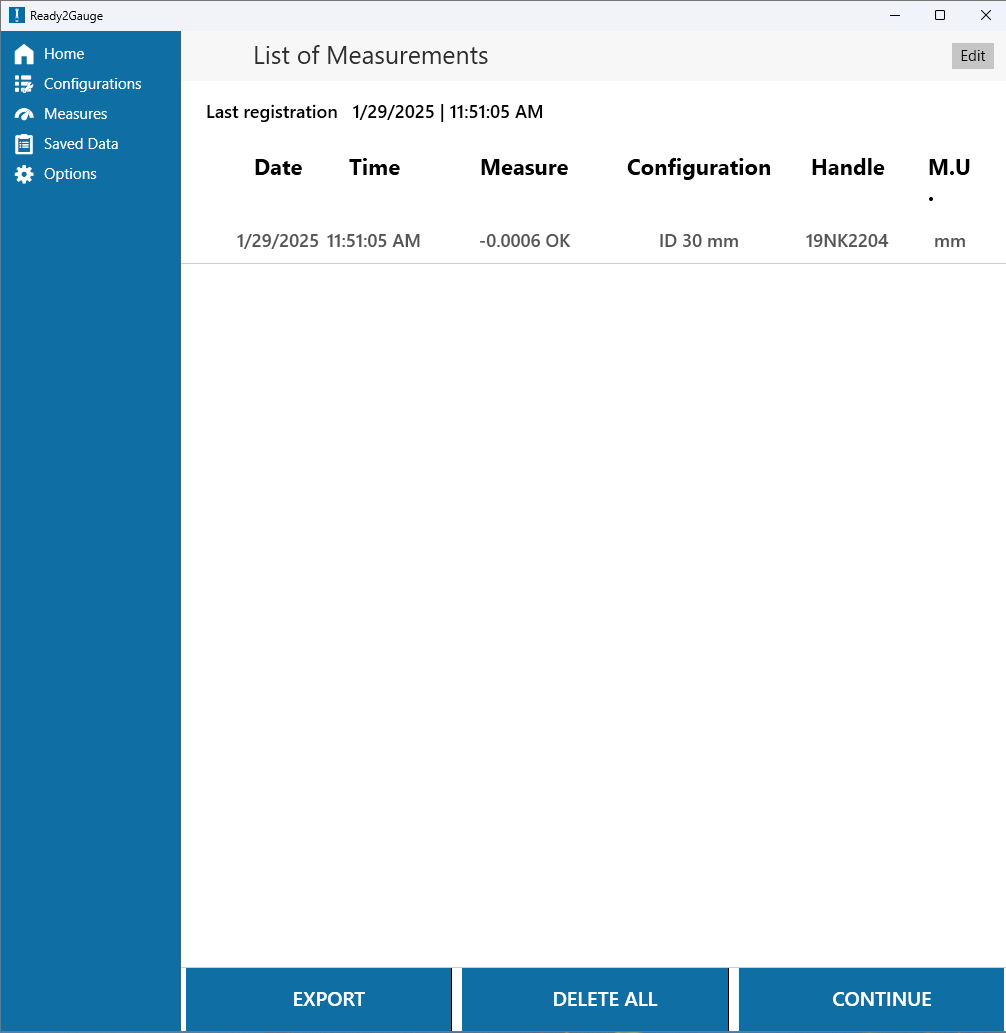
Run the Ready2Gauge software and connect to the handle using the pairing instructions in the tutorial video. The home screen should look like the following:
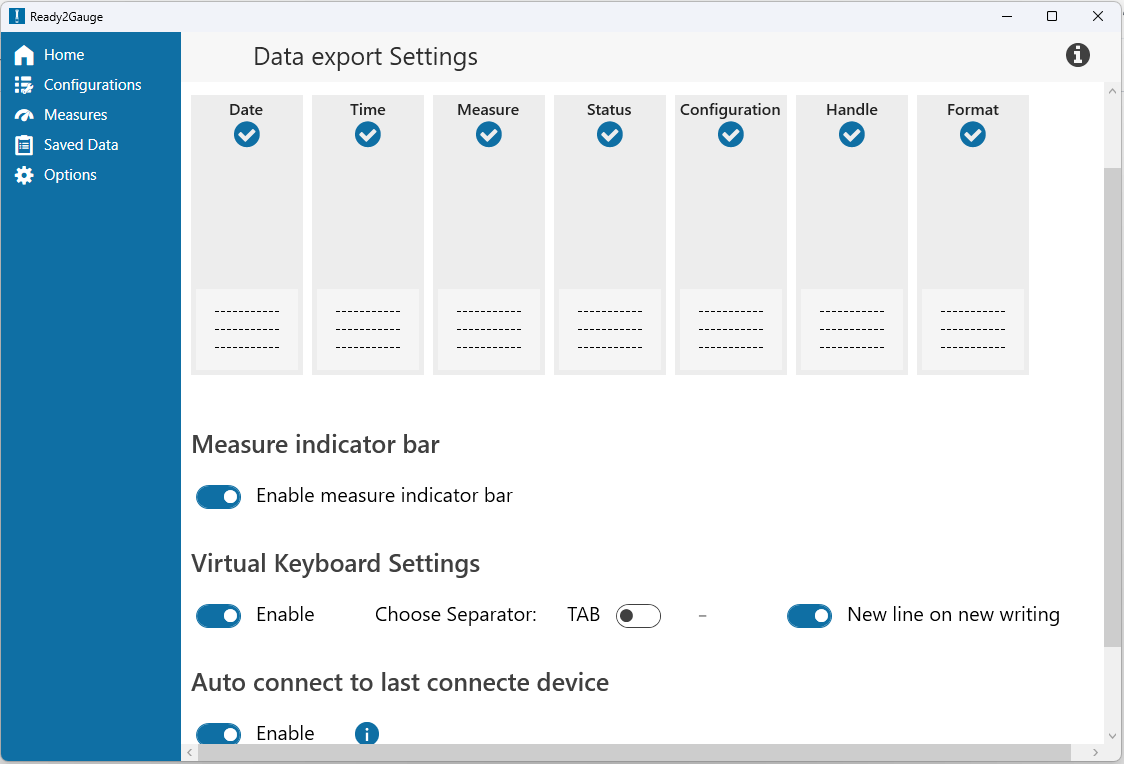
Select the Options section and check all boxes at the top so all data export settings are sent. Also make sure to enable New line on writing.
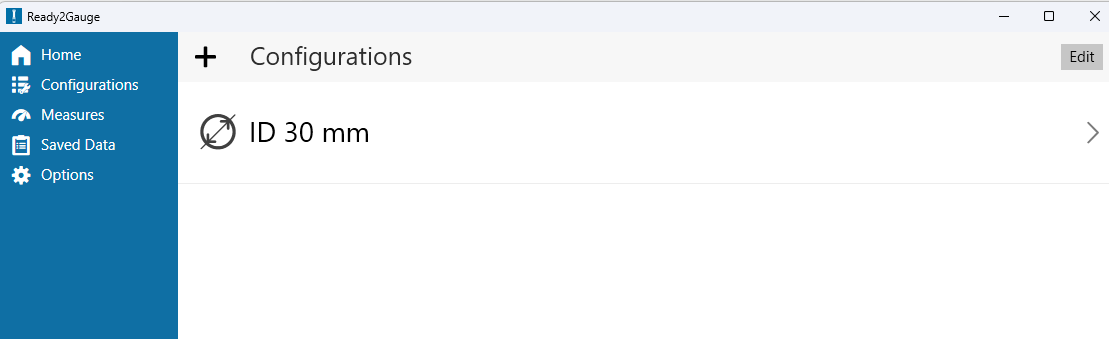
Select the Configurations section to set up the characteristic that will be measured. Select the plus icon (+) to the left of Configurations to create a characteristic that will be measured.
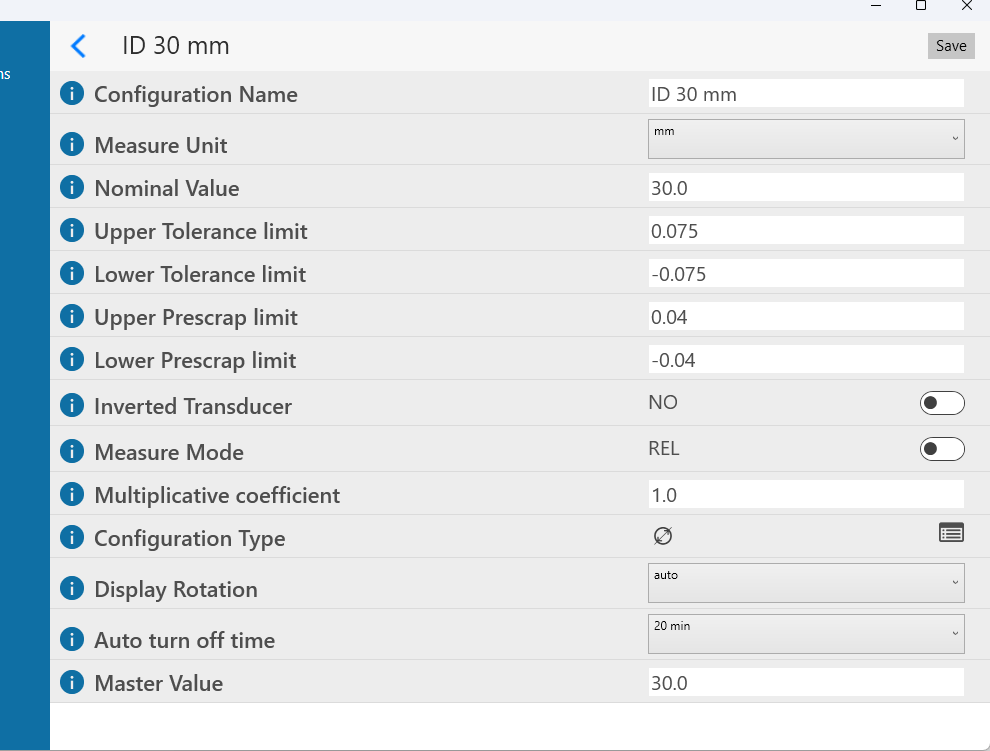
Enter the information about the characteristic and select Save in the upper right corner when finished.
Set Up QC-Gage to Collect Data
Start by downloading the two gage script files attached to the bottom of this article. Save them to the following directory on the local PC running QC-Gage: C:\Users\Public\Prolink\QC-Gage 4.3\Scripts
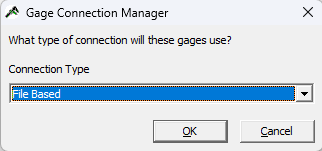
In QC-Gage 4.3, select Tools > Local Gage Connections (Gage Manager) and select the plus icon (+) to add a new gage connection.
Choose File Based in the Connection Type prompt.
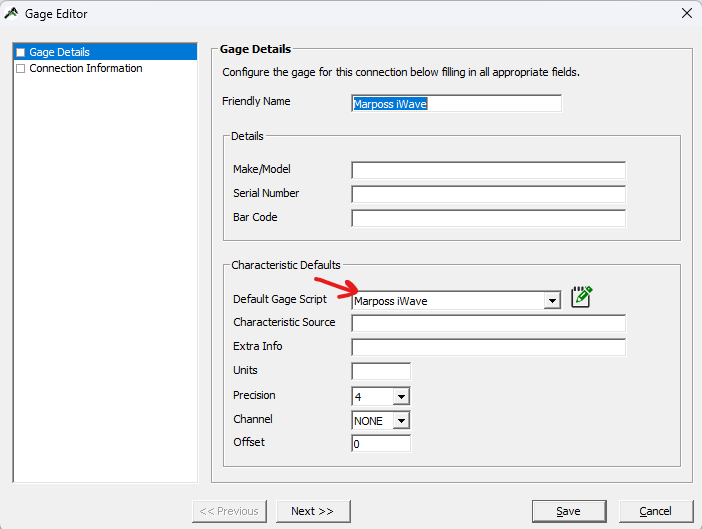
Choose Marposs iWave as the default Gage Script.
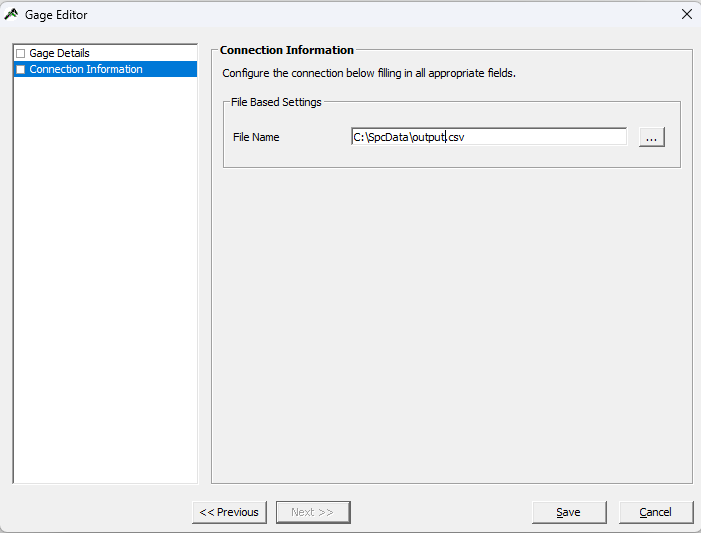
Set the file name to C:\SPCData\output.csv and click Save and then Close to go back to the main QC-Gage screen.
Select File > New Spec Plan to create a new spec plan. Configure any trace fields that are desired along with other options in the Spec Plan Wizard.
When configuring the characteristic to measure, choose the Marposs iWave option as the Collection Source.
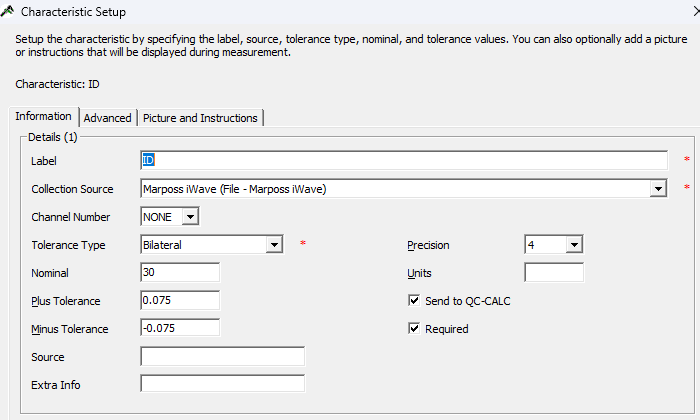
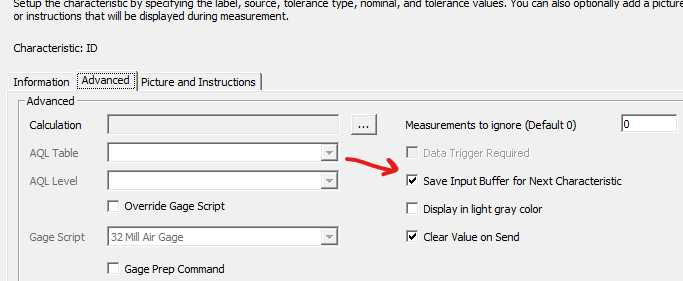
In addition, on the Advanced tab, check the box to Save input buffer for next characteristic.
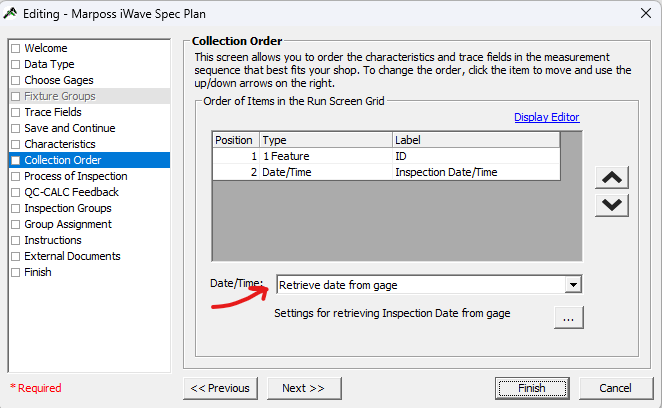
On the Collection Order screen, if the date/time is desired to be collected from the gage itself, choose to Retrieve date from gage and select the ellipses button (...).
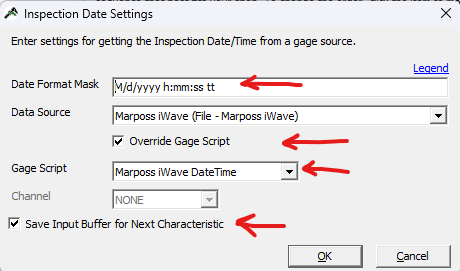
On the popup dialog, set the date format mask to "M/d/yyyy h:mm:ss tt", check the box to Override gage script and choose Marposs iWave DateTime from the dropdown list. Finally, check the box at the bottom to Save input buffer and select OK.
Set the rest of the spec plan options and save the spec plan.
PRO TIP: It is recommended that the Auto Finish checkbox is checked on the last screen in the Spec Plan Wizard. This will cause the spec plan to automatically send the data to QC-CALC and reset for the next measurement as soon as all points have been entered.
It is also recommended that the collection order be set so all trace fields are entered first and then the Marposs iWave measurements are taken.
Data Collection Process
First make sure Ready2Gauge, QC-Gage and QC-CALC are running.
In QC-Gage, launch the desired Marposs spec plan so it is ready to receive data from the iWave handle. Enter any trace fields so the only field left is the characteristic from the iWave handle.
In Ready2Gauge, select the Measures section. If not selected at top, select the device and configuration (characteristic) to measure.
Select Start Saving button in the lower right corner. This will put the software into measurement mode.
Position the gage and push either silver button on the handle. The measurement will appear on the right side of the screen in the column.
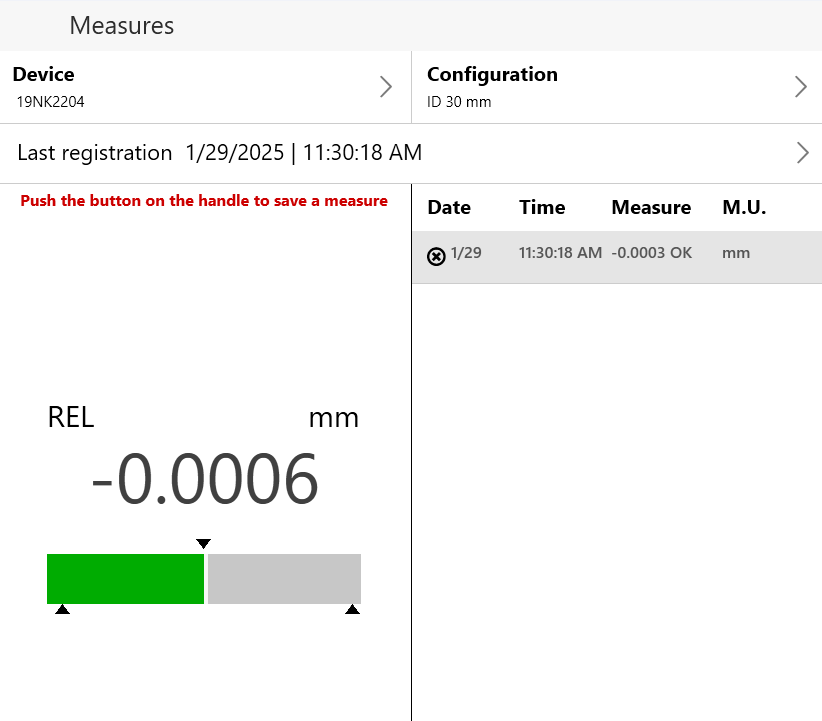
Select Stop at the bottom right.
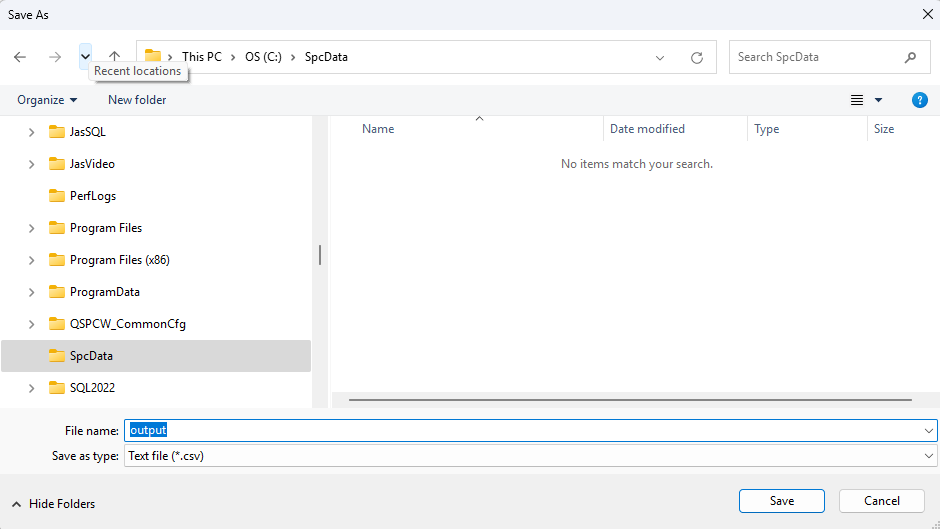
Select the Saved Data section. Select the Export button at the bottom.
Choose the C:\SPCData directory and type output as the name. On subsequent runs, the folder will be remembered and only output will be needed.
QC-Gage will automatically collect the data and display it on the Run Screen. If auto finish was chosen as recommended above, it will automatically send the data to QC-CALC Real-Time and reset to a blank screen.
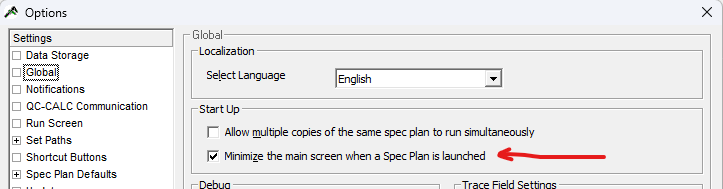
PRO TIP: It is recommended that the setting to minimize QC-Gage window is set in Tools > Options > Global. This will cause the main screen to automatically get out of the way when the spec plan is launched. When the run screen is closed, QC-Gage automatically pops back up allowing you to choose a different spec plan to run.
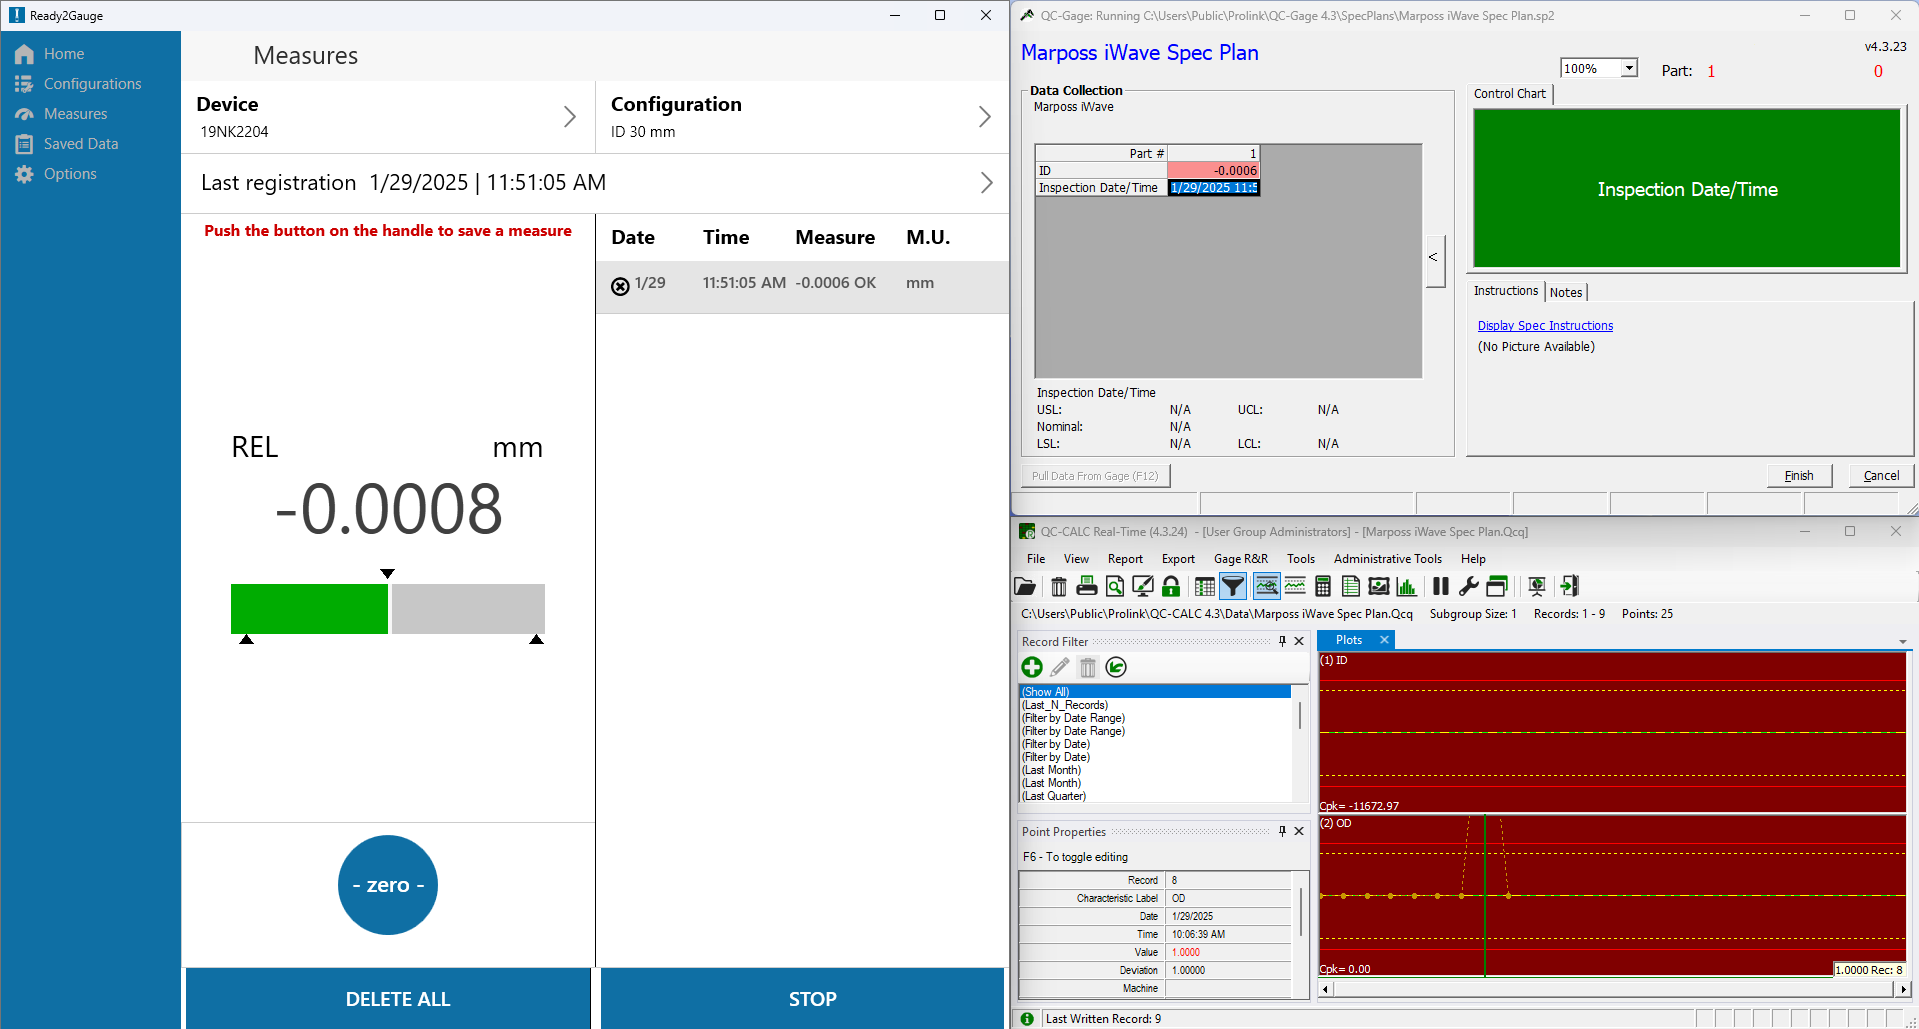
PRO TIP: It is recommended that you use the snap feature in Windows 10/11 to snap the various windows into position as seen below. The Ready2Gauge screen can be positioned in the left half of the screen and QC-Gage and Real-Time splitting the right half of the screen. Both QC-Gage and QC-CALC Real-Time remember their last screen position and will return to these positions when restarted.
Gage Scripts for Marposs iWave/Ready2Gauge Output
Marposs iWave.qsf
Marposs iWave DateTime.qsf