This article explains how to make a copy of a Raw Data template and add a row of Lower Spec Limit values to the heading area of the report's table.
Editing the Template
- In ERS go to Report > Design Templates.

- ERS will prompt you to select a report template. Choose "RawDataStats.rdr" and click Open.
- Now the Report Designer window will open with the selected template.

- Use the File > Save As menu to save the default template with a new name so the original template stays unchanged. An update may replace the default template, so if this step is skipped, you could lose your changes in the future.
- Use the Project area in the Objects panel in the top left area of the Report Designer window and double-click the "Table: part" item in that list.

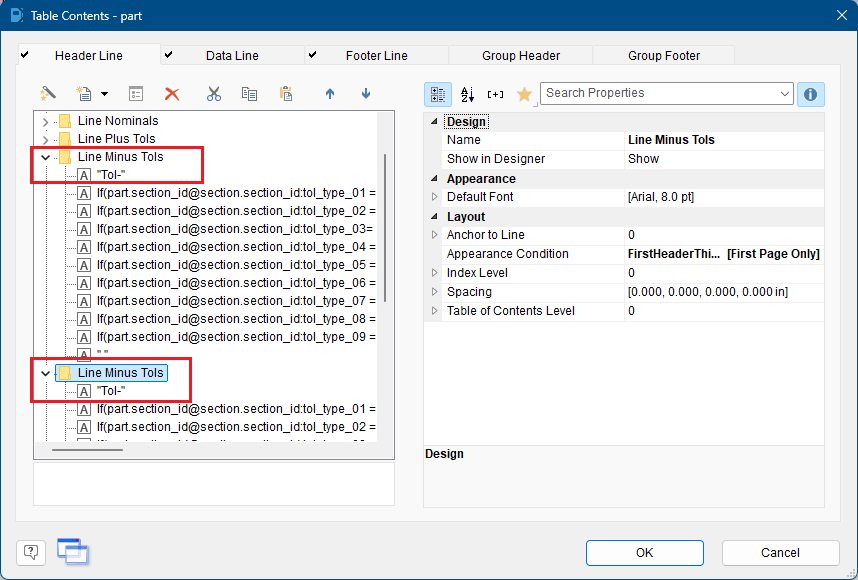
- The Table Contents - part window appears next. Choose the Header Line tab, and highlight the "Line Minus Tols" folder section.
- With that highlighted, click the Copy selected items into the clipboard button
 , then click the Paste line definition(s) or column(s) from the clipboard button
 .
. - You should now have 2 sections with the same name showing.

- With the lower "Line Minus Tols" item selected, hit the F2 key and change the name of that section to be "Line LSLs" instead. The rest of the work done here will be in the lines within this section.
- Double-click the "Tol-" line and change that value in the middle of the next window that appears to be "LSLs". This is the label for the row.
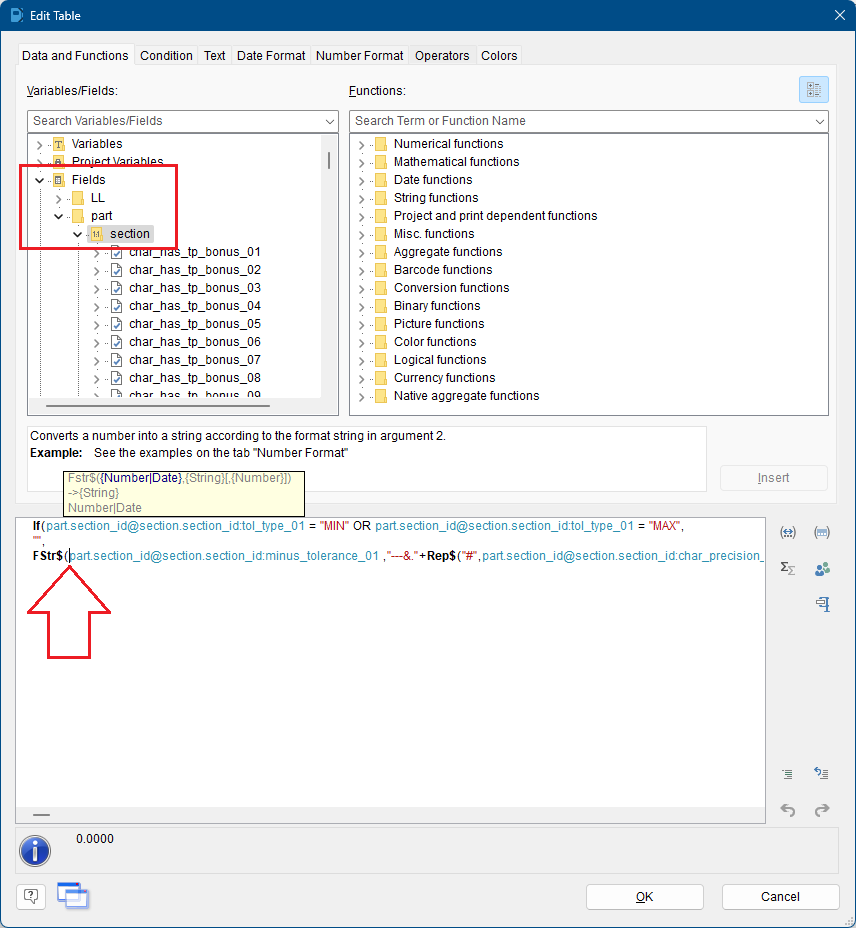
- Next, double-click the next line down. In the Edit Table window that appears, put the cursor to the left of the "part.section_id@section.section_id:minus_tolerance_01" field within the line, then open up the "Fields > part > section" area in the upper portion of the window.

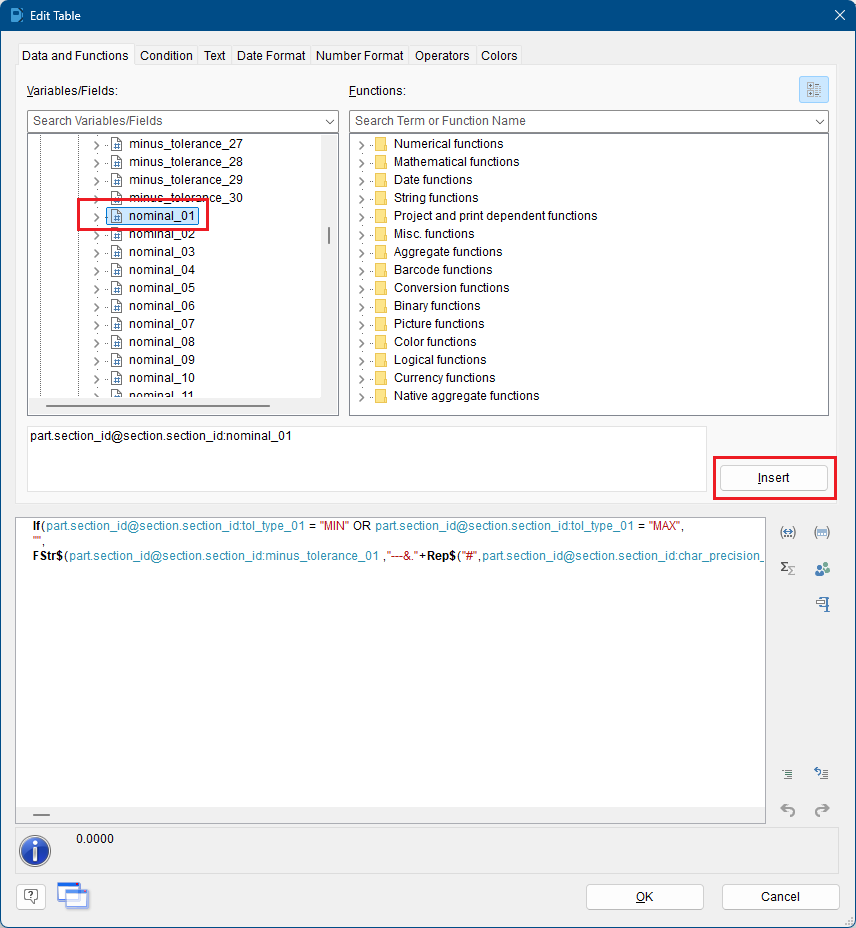
- Scroll down the list until you find the "nominal_01" item, highlight it, and then click the Insert button.

- This will insert that field and also the "+" sign that is necessary to actually add the minus tolerance value to the nominal.

- Click OK to save those changes.
- Repeat steps 11 through 14 for the rest of the items in the "LSLs" section using the nominal values for each of the corresponding characteristics (nominal_02, nominal_03, ...).
- When you're finished, go to File > Save or click the
 button to save your template and close the Report Designer window.
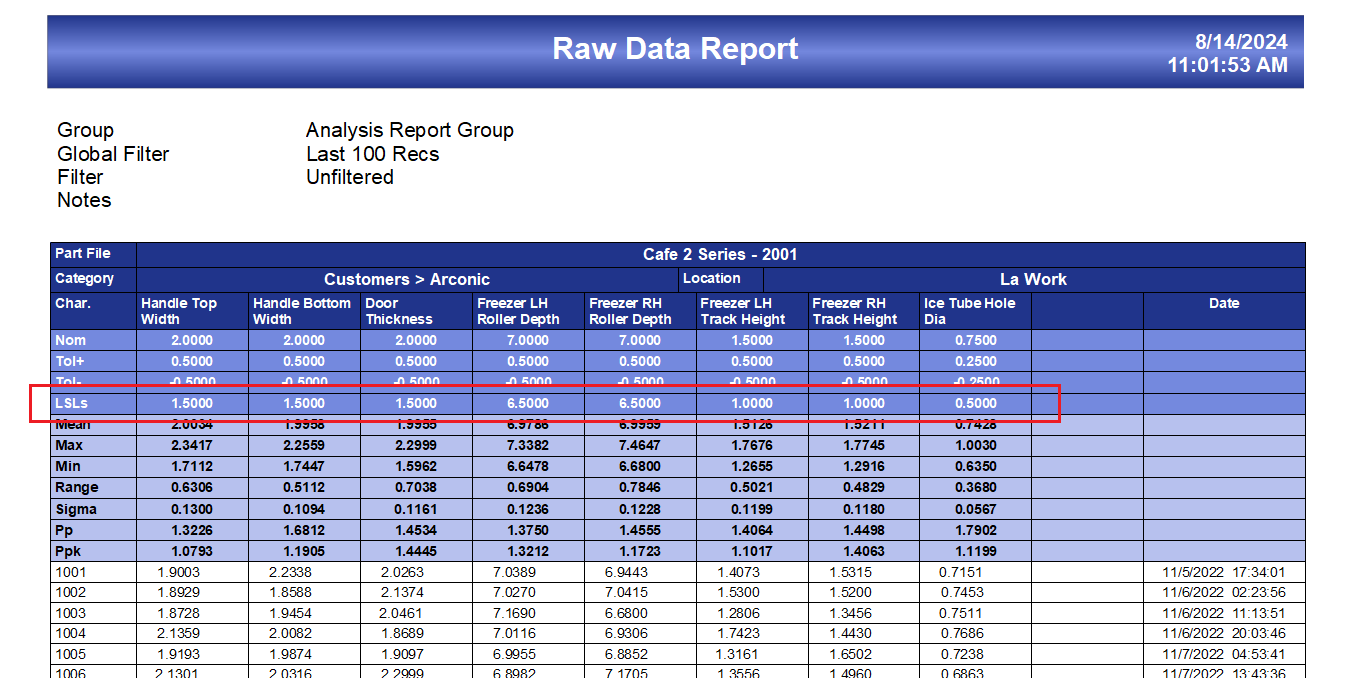
 - You can now run your report and you should see an extra row of LSLs in the medium blue header area.

Other Options for Making Changes
These basic changes can be slightly modified to do a few different things.
Change "Tol-" to "LSLs"
Just skip steps 7 through 9 and this will switch the line from being the Minus Tolerances and make them Lower Spec Limits instead.
Add a Row of USLs
All of the directions will be the same for this, but instead of highlighting the "Line Minus Tols" folder in step 6, you would highlight the "Line Plus Tols" folder, then continue with the rest of the directions. Well, you'd want to make the label "USLs" in step 10 too. The steps where you are adding the Nominal value would be the same though.
Change "Tol+" to "USLs"
All of the directions will be the same for this, but instead of highlighting the "Line Minus Tols" folder in step 6, you would highlight the "Line Plus Tols" folder. After that, you would skip steps 7 through 9 (making the copy portion), then change the label to "USLs" in step 10. The steps where you are adding the Nominal value would be the same though.