Adding Signatures to QC-CALC Reports - 4.3
Print Friendly View
written: 11/11/2024
last modified: 01/07/2025

If you are using Part 11 mode in QC-CALC, you can print reports that include a signature picture or digital signature (e-sign). This article goes through the steps for adding a signature picture to your Part 11 user and then modifying a report template to include that signature picture in reports you print. Additionally, it covers how to check that your PDF report has been successfully digitally signed.

Signing a Report with a Signature Picture

Assign a signature picture to your Part 11 user

  1. Go to Administrative Tools > Manage User Groups...
  2. Select your User Group and click the pencil icon image.png to edit it.

    image.png
  3. In the Options window, go to the Part 11 section.
  4. Select your Part 11 user and click the pencil icon image.png to edit it.
  5. In the Edit User window, click the green plus icon image.png to add a signature picture.
  6. Click OK and then click OK again to save the changes and return to the main screen.
  7. When the Report Designer asks you if you changed the number of characteristics in the template, select No.

image.png

Edit the Report Template

  1. In QC-CALC Real-Time, go to Report > Print Report...
  2. Select your Report Type and Template File Name and click the Design Template button.
  3. In the Report Designer select the Insert tab and then select Picture.

    image.png
  4. Draw a rectangle on the report where you want the signature.
  5. In the Source Selection window choose Formula.

    image.png
  6. Next, enter SignaturePicture as the formula, and click OK.

    image.png
  7. Go to File > Save to save your template
  8. In Report > Print report...:
    1. Set Report Destination to File.
    2. Set File Format to Adobe PDF Format Signed.

      image.png
  9. Click the Print button to print your report

If you are signed in as a Part 11 user and your Part 11 user has a signature file, you should now see your signature when you print the report, as in the example below.

image.png

Digitally Signing A Report with E-Sign

  1. In QC-CALC Real-Time, go to Report > Print Report...
  2. Set the Report Destination to File.
  3. Set File Format to Adobe PDF Format Signed.
  4. Click the Print button to print your report.

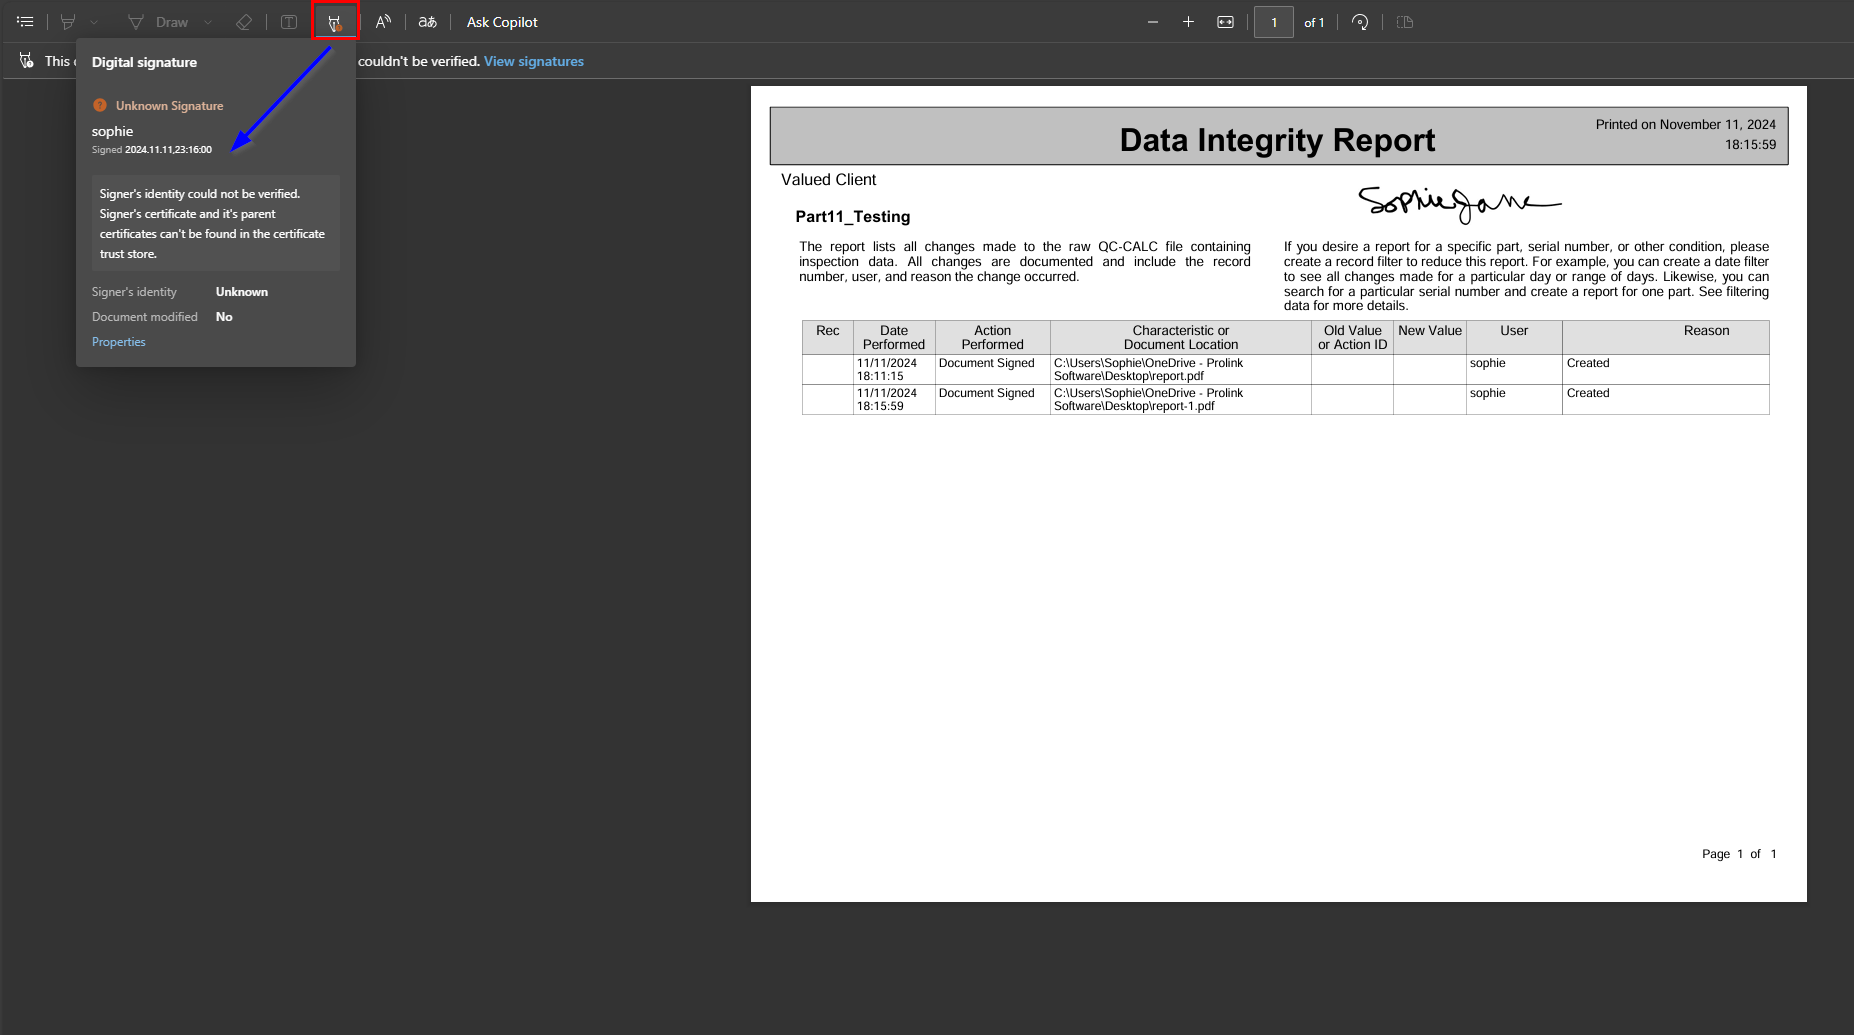
When you open the PDF file, you should see text somewhere indicating something like:

This document is digitally signed. Some signatures couldn't be verified.

Next, look for an icon that looks like a pen, pencil, or something indicating "signatures". Here is example from the Microsoft Edge web browser:

image.png

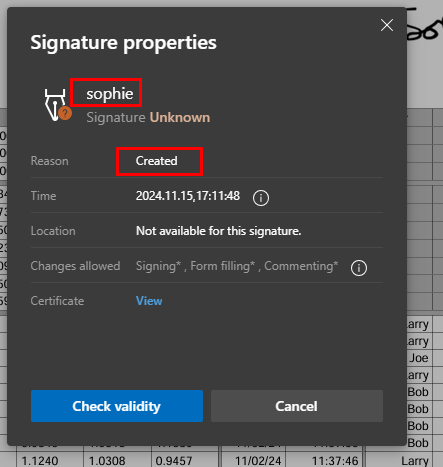
Here are the signature properties. Note that the Part 11 user name and Reason Code are displayed:

image.pngimage.png


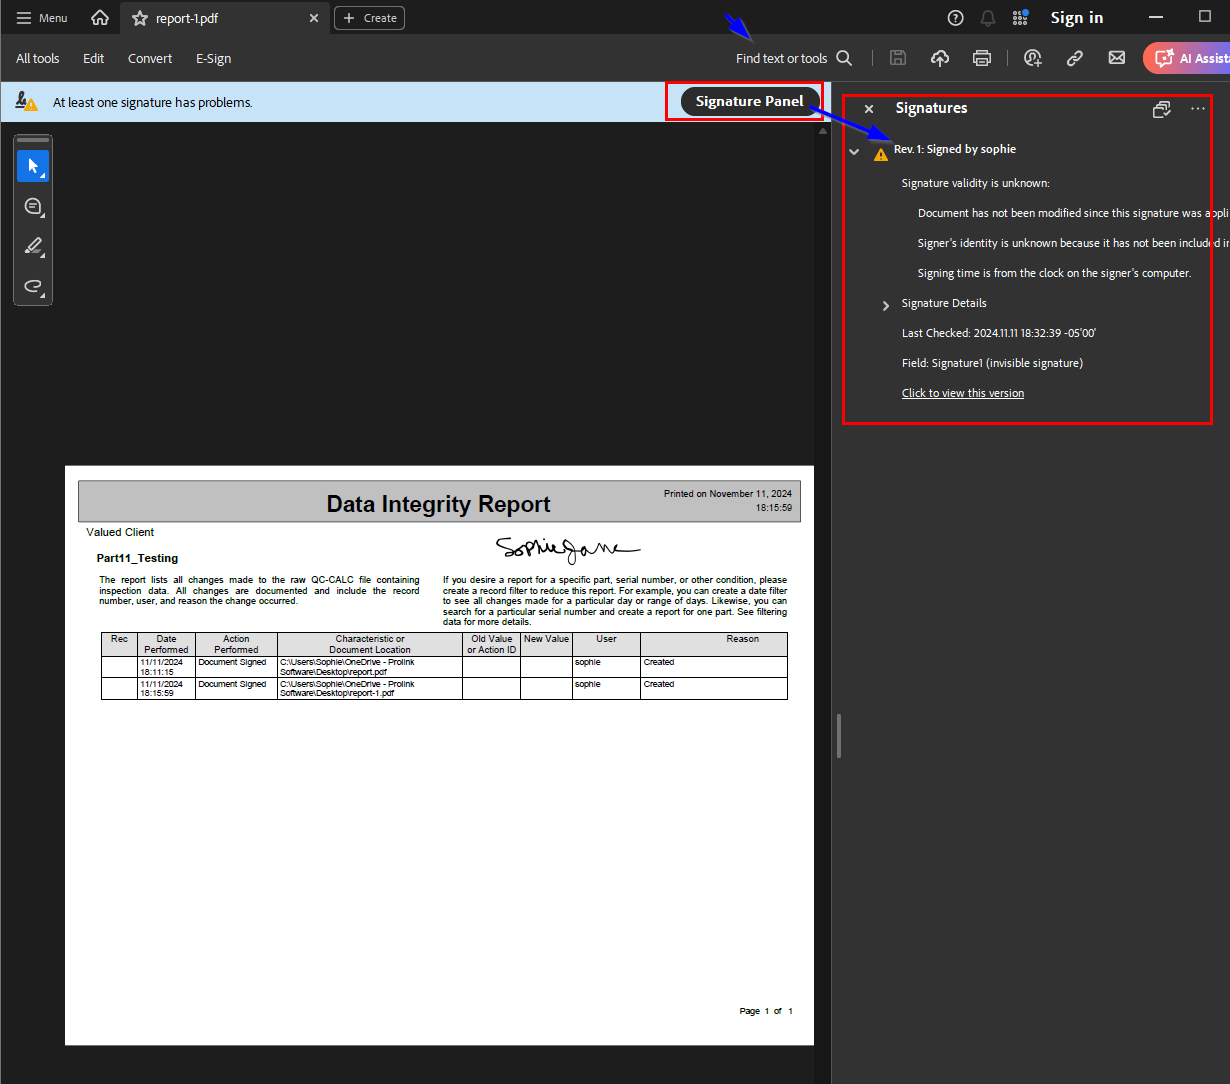
Here is how it appears in Adobe Acrobat:

image.png

Note: There are other steps involved for generating a valid certificate for digitally signing documents. QC-CALC Real-Time does not do this part so it is up to you to look into cerificate-based signatures, if needed. Adobe has a few resources with more information:

https://helpx.adobe.com/acrobat/kb/certificate-signatures.html

https://helpx.adobe.com/acrobat/using/certificate-based-signatures.html

Category

Reporting - QC-CALC Real-Time 4.3
See more articles in this category