The default Stat Summary reports that come with QC-CALC may show more calculations than you wish to see. This Knowledge Base Article will give step-by-step instructions for designing your own custom template and removing a calculation column (Cp in this case) from the main Stat Summary template.
The Report Designer
The directions shown here will remove the Cp column of calculations from the report. This is a lengthy process but relatively simple to accomplish.
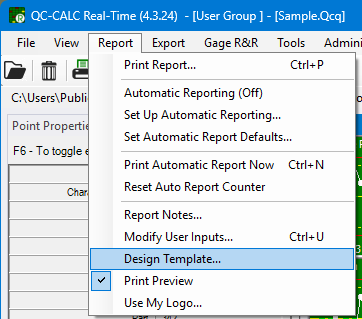
- From QC-CALC Real-Time, choose the Report > Design Template menu.
- Make a copy of the StatSum.STT template (highlight the file, CTRL + C to copy and CTRL + V to paste within the same list) in the list, highlight the copy, and click Open.
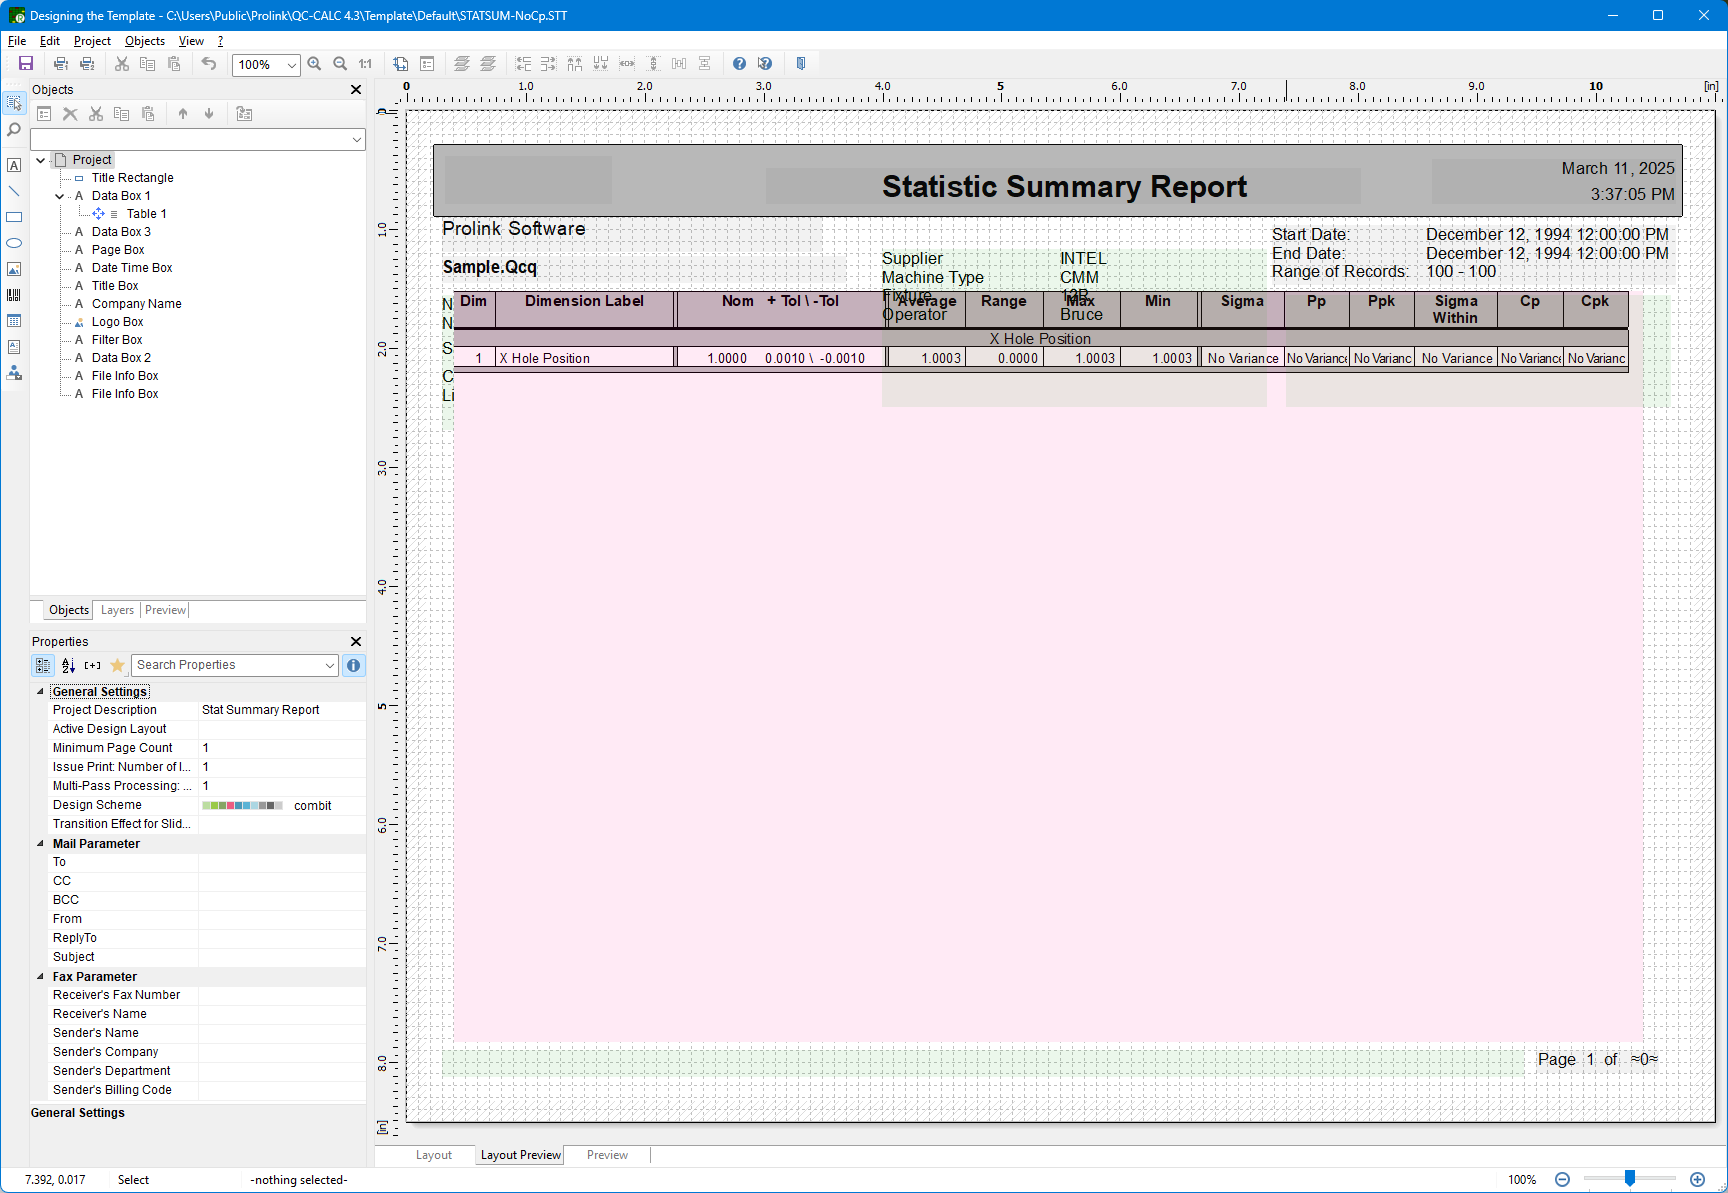
- The Report Designer now appears on the screen as shown below.
Header Lines
- Double-click on the table (the large pink area in the middle of the screen), and the Table Contents window will appear.
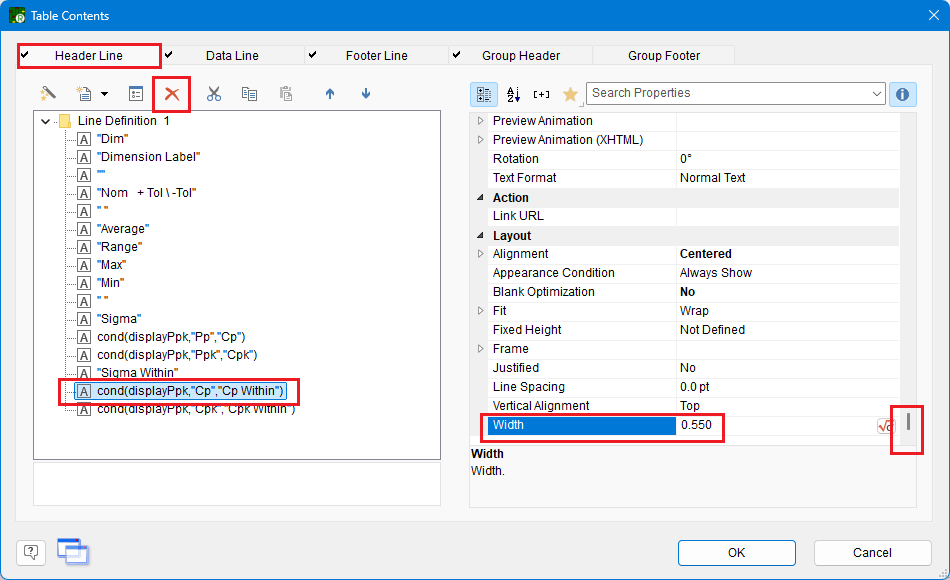
- Choose the Header Line tab and highlight the “cond(displayPpk,"Cp","Cp Within")” line in the Line Definition 1 area.
- Before removing this, we need to find the Width of this column so that the value can be used to fix other areas. Scroll to the bottom of the list on the right side of the window, find the Width value, and write it down for later use.
- Next, click the red X button to delete the "Cp" line from the list.
Data Lines
Now that the column heading has been removed, it is time to switch to the Data Line tab.
- Once you switch to the Data Line tab, you will need to find the line that represents the "Cp" calculation column. In order to find the correct column, start from the bottom and float the mouse over each line. The 2nd line from the bottom should end with a "FStr$(Cp,"--&.##")))". That "Cp" means that is the correct line.
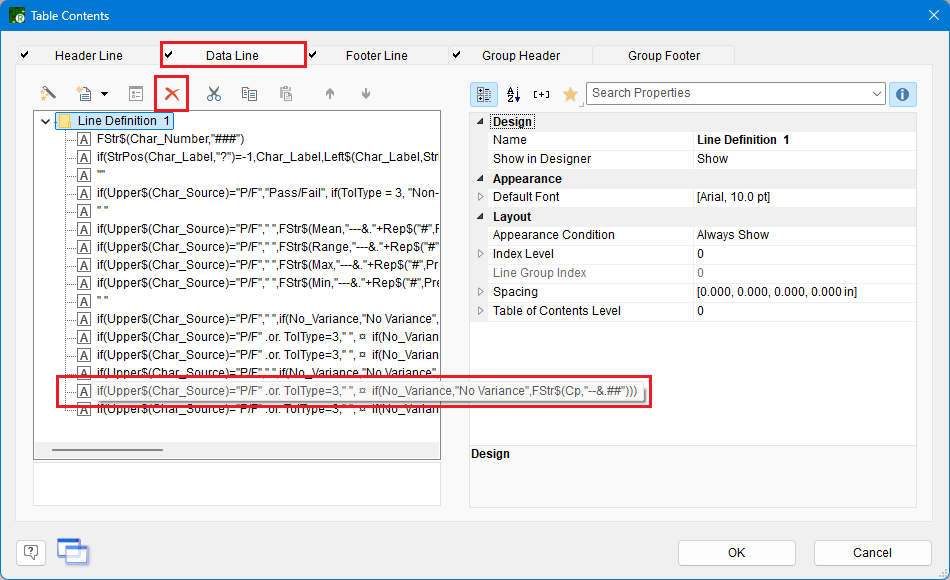
- Highlight that line that has the "Cp" in it and click the red X button to delete it.
Clean Up
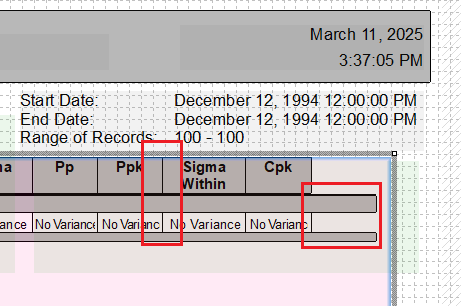
Most of the work is done now, but some cleanup is still needed to finish the report correctly. Some gray lines that appear on the report, along with the footer lines, need to be adjusted so they are the same width as the remainder of the rows of the report. The "Cp" column has been removed from the pic below, but the gray lines are sticking out further than the other lines.
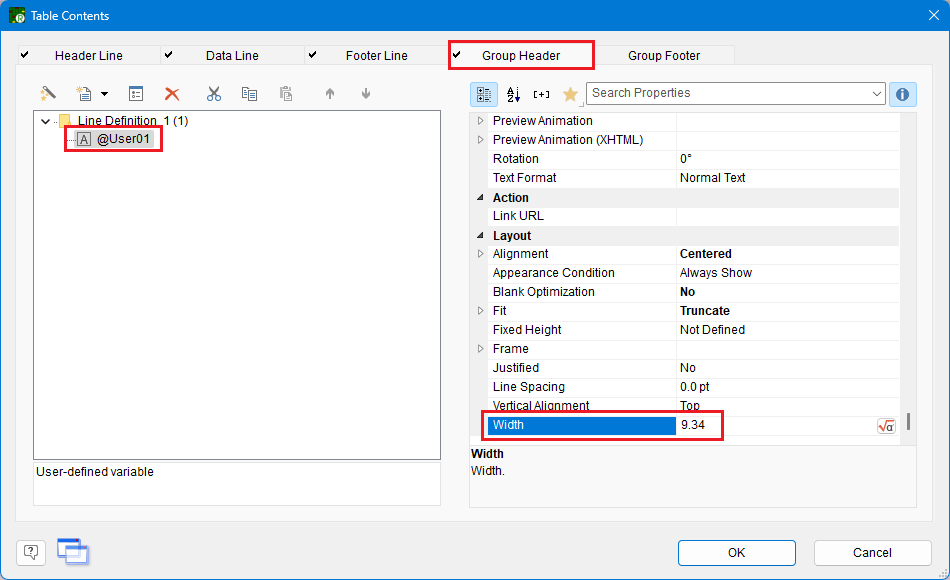
- On the Footer Line tab, highlight the " " line and then look at the Width property at the very bottom of the list on the right side of the screen.

- The Width value you wrote down in step #3 from the Header Lines section will need to be subtracted from the Width shown in the picture above. In this case, 9.890-0.550= 9.340. Replace the 9.890 value in the picture above with the 9.340 value that was calculated.
- Next, switch to the Group Header tab, choose the “@User01“ item on the left, and change the Width value to the value you calculated in the previous step (9.340 in this case).
- Click OK on the Table Contents screen and save your changes (File > Save).
- You have finished this process. Run your report now (make sure you are using the template you just changed) to make sure the results are what you expect.