This page is included for those people who wish to install and use MarCom with minimal instructions. Complete details follow.
Setting up MarCom for RS-232 Output
- In MarCom, set up an Emulation or Interface box activating as COM3
- Add your wireless gages and connect to them via RF.
- For each gage, choose to transfer to Virtual Interface Box and choose the COM3 box you set in step 1.
- Optionally specify a port number (channel in QC-Gage).
- In QC-Gage, create your spec plan and link to COM3 (either in the spec plan or through Global Gages – use Mahr Wireless (MarCom) gage script).
- When creating features, link to the appropriate gage, set the channel and optionally set the units.
Setting Up MarCom for RS-232 Output
Introduction
All Mahr wireless gages communicate with built in wireless, communicate through a USB receiver to the PC. You must install MarCom Professional to receive the communications and pass it along to other software packages. This document will walk you through the steps to set up MarCom to output to a virtual COM port so that QC-Gage can receive the data from the gage.
NOTE: You must install MarCom Professional in order to use a virtual COM port (RS-232) communication with QC-Gage as MarCom Standard does not have this functionality. As of Summer 2017, MarCom Professional is now a free software product available for download on Mahr’s website.
Setting Up Virtual COM Port
Once you have installed MarCom Professional, it should launch itself and appear on screen as follows:
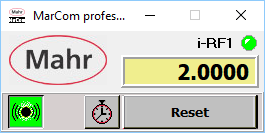
- Open the settings by double clicking on the Mahr logo.
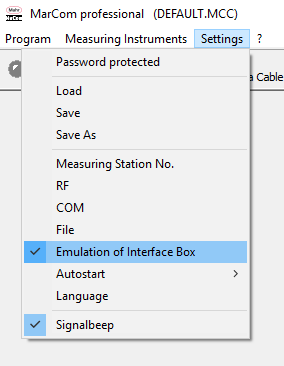
- In the main settings screen, choose Emulation of Interface Box from the Settings menu.
- In the Virtual Interface Box settings window, check the Active checkbox to the right of the first row. Click OK to save changes.
NOTE: You can activate as many COM ports as you would like and link different gages to different COM ports. In this example, we are only activating the first COM port.

Add RF Devices
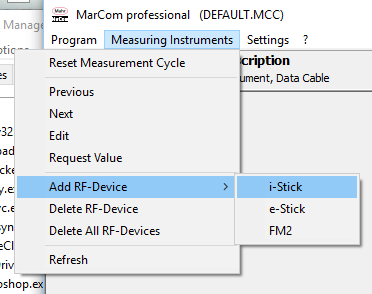
- Select Measuring Instruments > Add RF Device > i-stick.
NOTE: Depending on the device you are adding, you may choose e-stick or FM2. In our case, we are adding a standard caliper.
- In the Parameters screen, choose the instrument to install from the Instrument drop down list and optionally name it with the Description field.
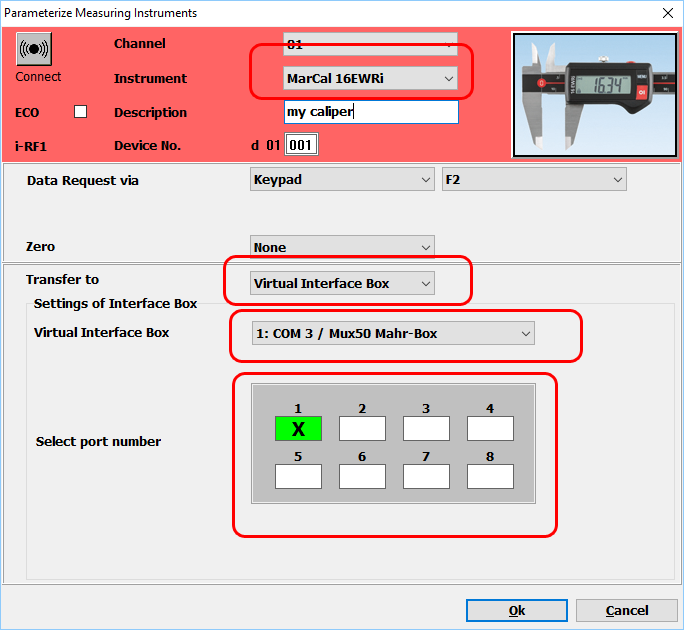
- In the Transfer to area, choose Virtual Interface Box from the drop down list and choose the virtual COM port you just created above. You can also optionally choose a port number at the bottom. This will be viewed as a channel number by QC-Gage. If left blank, MarCom will send zero.
- When finished, setting up the gage, click the Connect button in the top left corner of the screen. The connect button will flash yellow, connect with your gage and eventually flash green when connected.
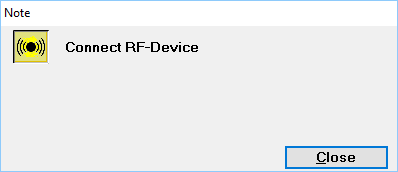
- Once connected, you’re ready to use the gage in QC-Gage. Click OK to close the parameters window.
Setting up QC-Gage Global Gage/Spec Plan
- In QC-Gage, set up a global gage via Tools > Global Gages. Click the green plus sign to add a new global gage.
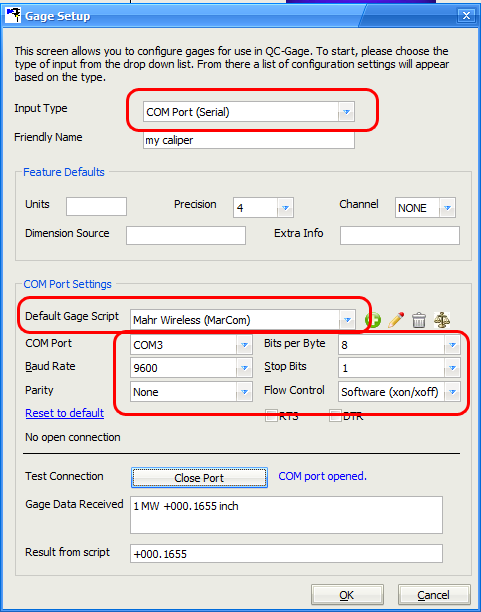
- In the Gage Setup screen, choose COM Port (serial) at the top, name your gage and fill out the COM port settings below according to the following:
Gage Script: Mahr Wireless (MarCom)
COM Port: COM3
Baud: 9600
Bits: 8
Parity: None
Stop bits: 1
Select OK to save changes.
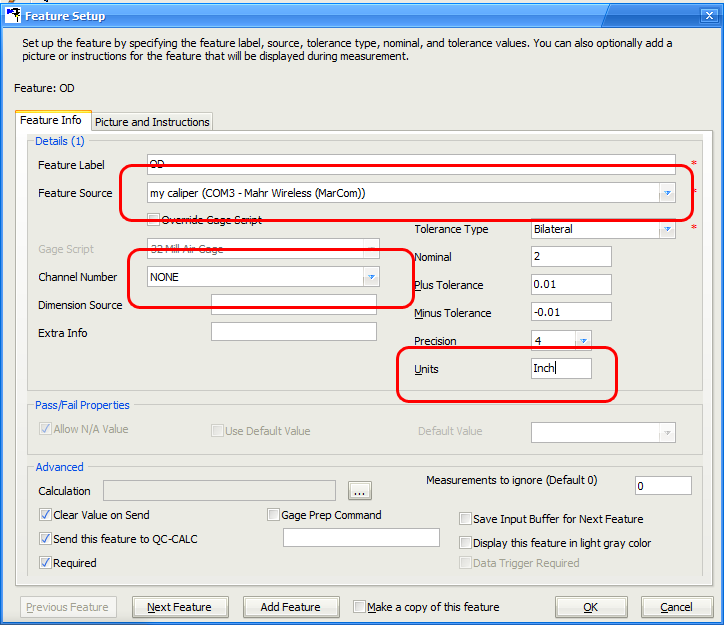
- Create your spec plan in QC-Gage. When specifying the features, choose the global gage you created to link the feature source.
Channel: If choosing to enforce channel number, choose it from the drop down list. If not, choose NONE.
Units: The Mahr Wireless gage script populates the units field with either “mm” or “inch” based on the setting from the gage. If you choose to enforce this in your spec plan, type it in the Units field. Otherwise, leave the field blank.
- Finished.