When setting up a gage in QC-Gage 4.3, you will need to create a connection. This connection is used to group gages that are on one block so that if the COM port changes for the block, the gages do not need to all be reset. This article reviews the steps for creating a new local gage connection, replacing an existing gage, and assigning a new gage to a Spec Plan.
Create a Local Gage Connection
You can manage your local gage connections in the Tools > Local Gage Connections menu. Here you can add, edit, and delete gages.
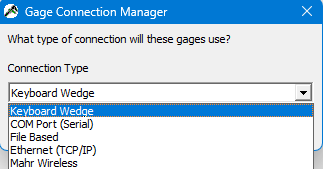
- Click the Green Plus button
 to add a new local gage connection. You will be prompted to select a Connection Type.
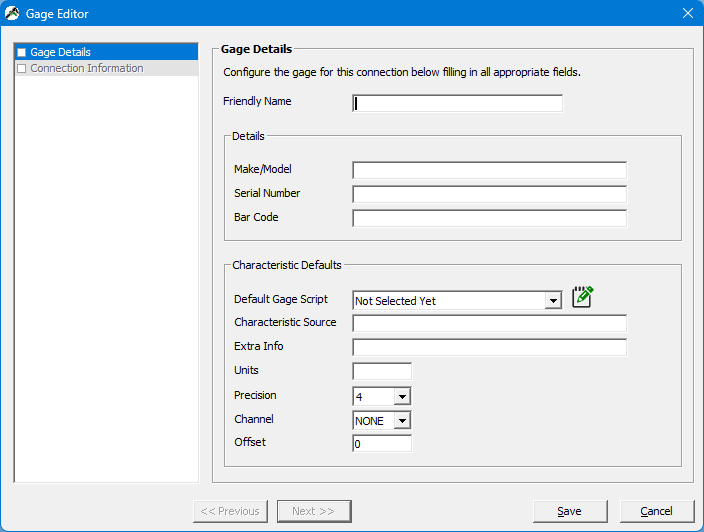
- After you select your Connection Type, the Gage editor window will be displayed. Enter the details for your gage on this screen.
- If the Next >> button is available, select it to advance to the Connection Information screen.
- If the Next >> button is not available, you chose a Connection Type that does not require connection information.
- On the Connection Information screen, set the connection information so QC-Gage can connect to your device.
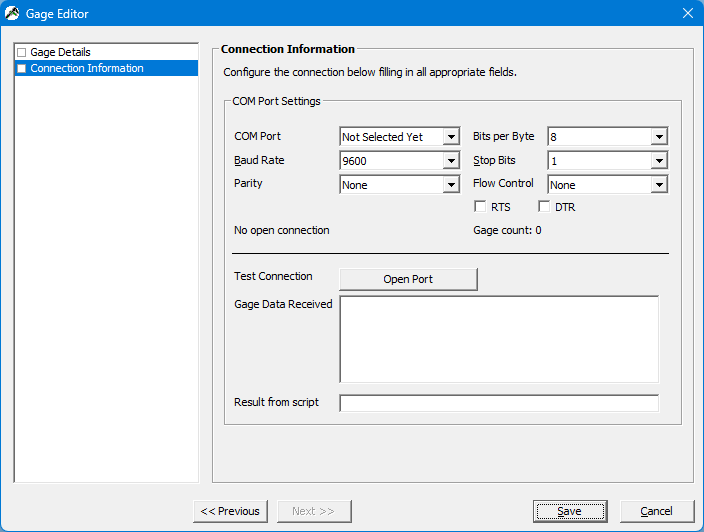
- When done, select the Open Port button to test the connection and then send some data from your device. QC-Gage will display "COM port opened" in blue text next to the Open/Close Port button.
- When QC-Gage receives the data it will be displayed next to Gage Data Received" as in the picture below.
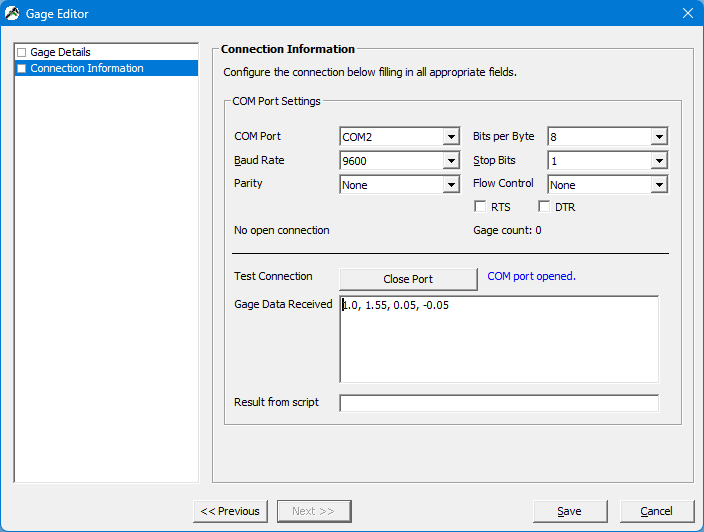
- Select the Save button when you are finished setting up the local gage connection.
Replace an Existing Gage
- If you need to replace one of the gages in Tools > Local Gage Connections, select the gage you want to replace and then select the Replace Gage button
 .
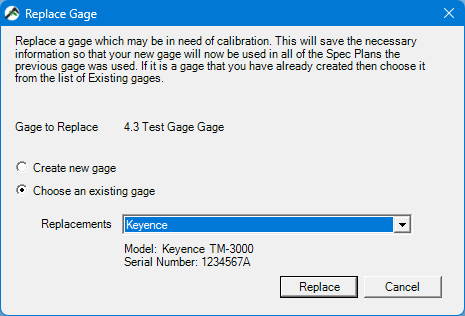
. - In the Replace Gage window that opens choose to either "Create new gage" or "Choose an existing gage".
- If you choose to create a new gage, you will be asked to select a Connection Type and then enter the connection settings of the new gage.
- If you choose "Choose an existing gage", select a replacement gage using the Replacement selection box, as in the picture below.
Assign Gages to a New Workstation
Gages are assigned based on the workstation name. This means if you have to move to a new computer, your gages may appear to be missing when you go to run your spec plan on the new computer. In this case, you can use the Tools > Workstation Gage Assignment menu to rename your workstation and/or assign gages to characteristics in spec plans.
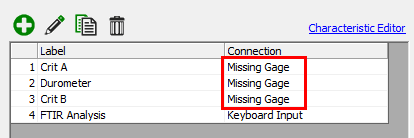
If you don't rename your workstation and you edit your spec plan, you'll find the gages assigned to your characteristics are missing, as in the picture below.
When you run a spec plan with a missing gage, the Missing Gage for Characteristic window will be displayed.
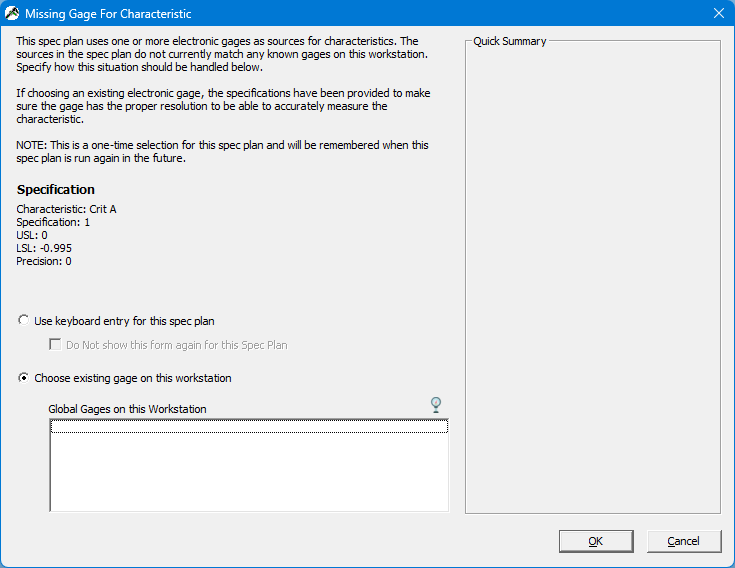
In this case, renaming your workstation within QC-Gage to match the former computer name will fix the missing gages.
update your workstation name in QC-Gage
- Go to the Tools > Workstation Gage Assignments menu item.
- Select the Rename Workstation button

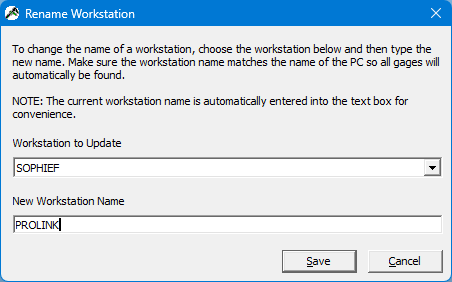
- In the Rename Workstation window that opens, select your current workstation name using the Workstation to Update selection box and then enter the new workstation name in the New Workstation Name box.
- Select the Save button when you are finished.
- If you renamed your workstation to have the same name as your previous computer, you should now be able to see your old gages in the Tools > Local Gage Connections menu.
Assign gages to spec plans
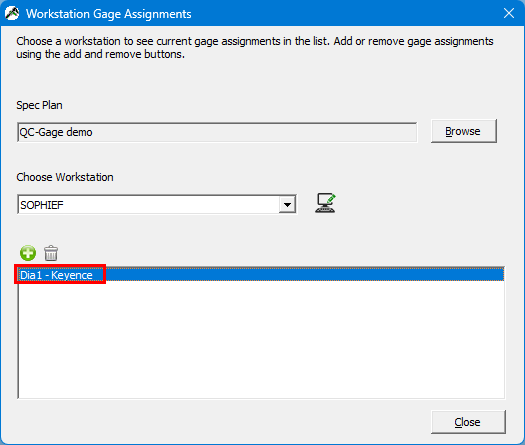
You can assign the local gage connections you created to specific characteristics in spec plans using the Tools > Workstation Gage Assignments menu. This allows you to collect data for those characteristics using the chosen gage.
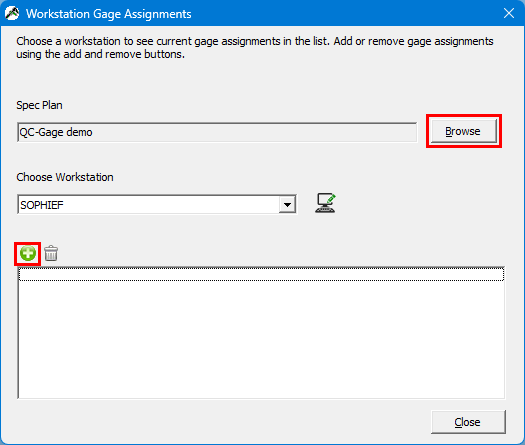
- Go to the Tools > Workstation Gage Assignments menu item.
- Select the Browse button to choose a Spec Plan.
- Select the Green Plus button
 to add a new gage to the selected spec plan.
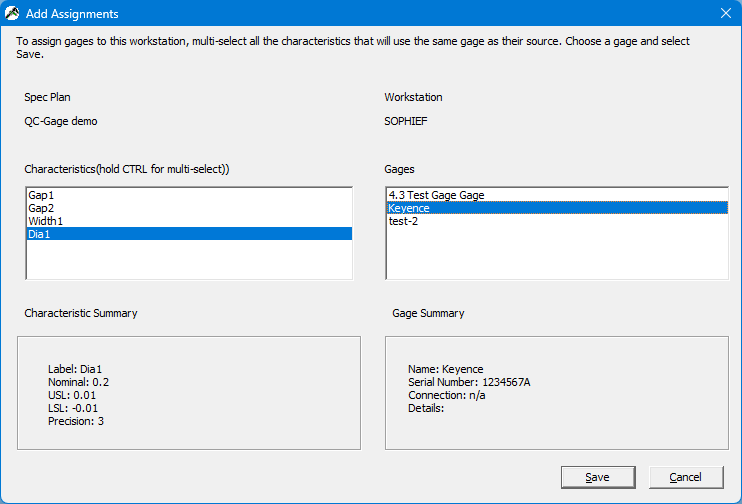
- In the Add Assignments window, select one or more Characteristics on the left. You can hold the Control (Ctrl) key down while selecting to select multiple characteristics at a time.
- Select a gage from the list of Gages. This gage will be applied to the selected characteristics.
- Select the Save button when done.
- QC-Gage will return to the Workstation Gage Assignments window. The gage you just assigned to the spec plan will now show in the list at the bottom of the window.