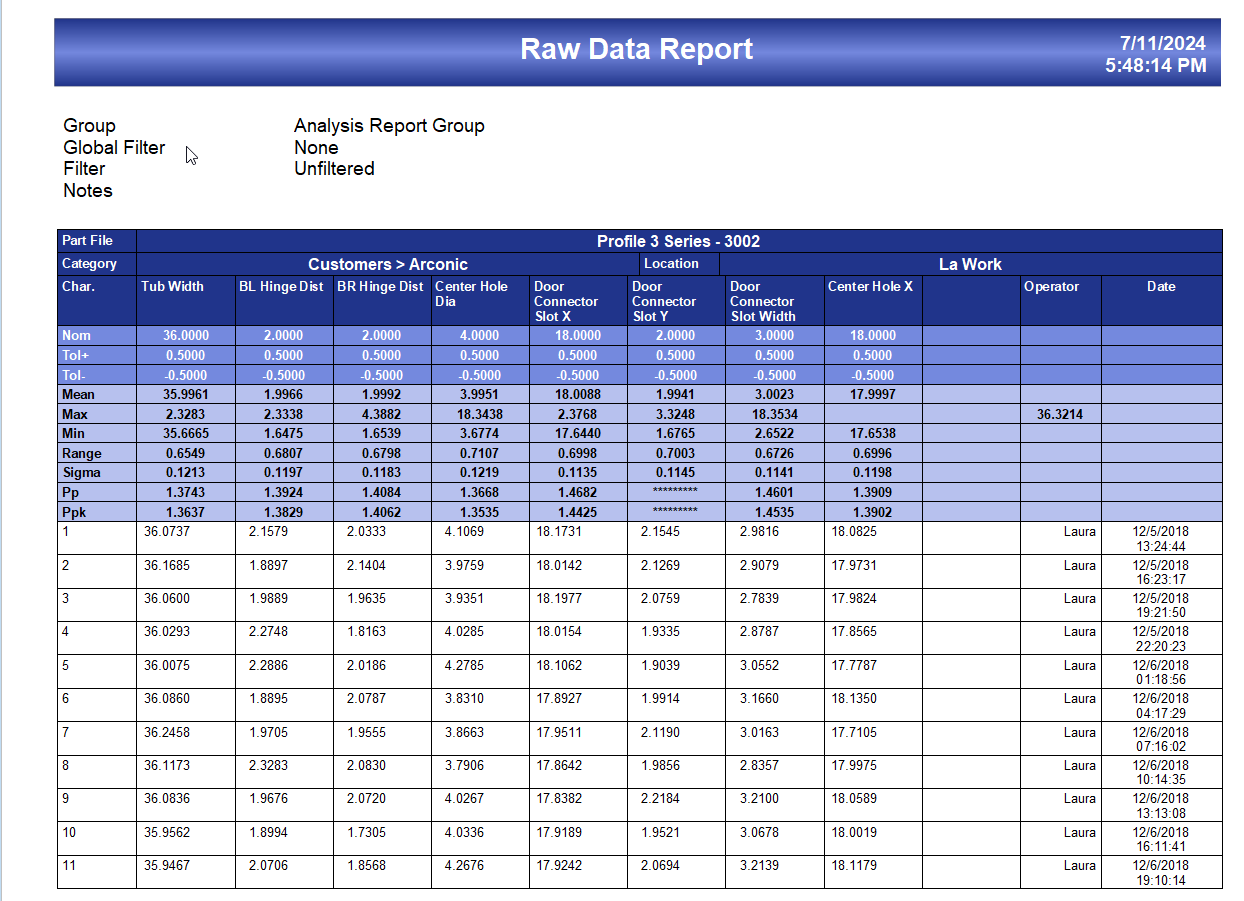
In this tutorial, you will learn how to modify an existing ERS Raw Data Report template to change a text trace field so that the report prints a different trace field. This will be useful if you have standardized trace fields in specific positions across different part files.
Preparation
First, we will make a copy of an existing template file to edit. Next, we will use QC-CALC Real-Time to look up the trace field position numbers for the trace fields you want to include in the report template. Finally, we will make the necessary changes to modify a column of trace fields.
Check Trace Field Positions in QC-CALC
Trace fields are referred to by variables in the Report Designer such as trace_text_value_01. To make sure you use the correct variables for the trace data you need, you can look up these trace field position numbers in QC-CALC Real-Time:
- In QC-CALC Real-Time, to open the part file for which you are creating the report template, go to File > Open and select the file you need.
- Go to File > Properties... > Edit Nominals & Tolerances.
- In the window that opens, look in the Trace Fields sections in the list on the left. You may have to scroll to the bottom of that list to find them.
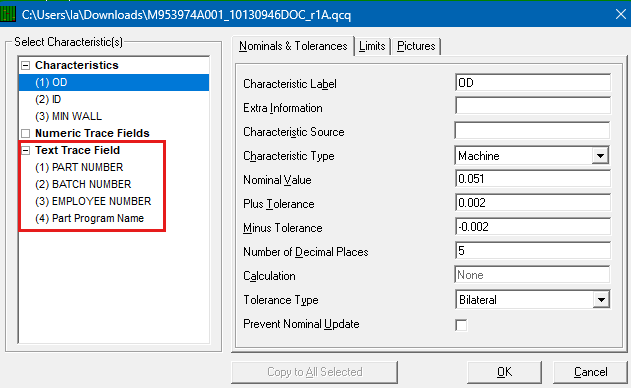
- Note the number in parentheses next to the trace fields, you will need to know these for the Report Designer.
Editing the Template
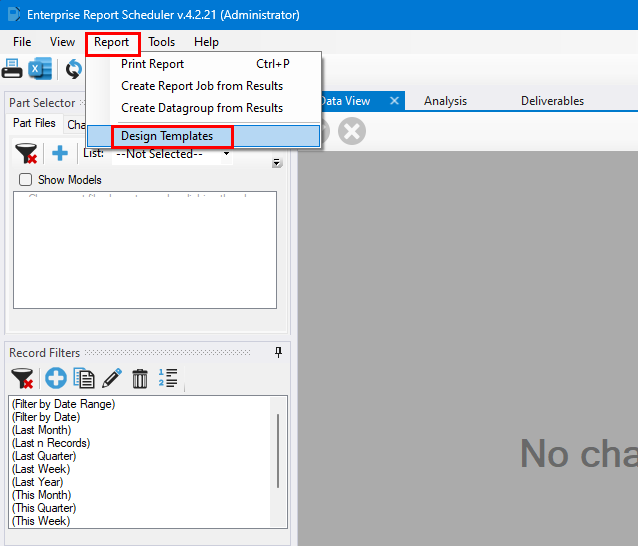
- In ERS go to Report > Design Templates
- ERS will prompt you to select a report template. Choose RawDataStats.rdr and select Open.
- Now the Report Designer window will open with the selected report template
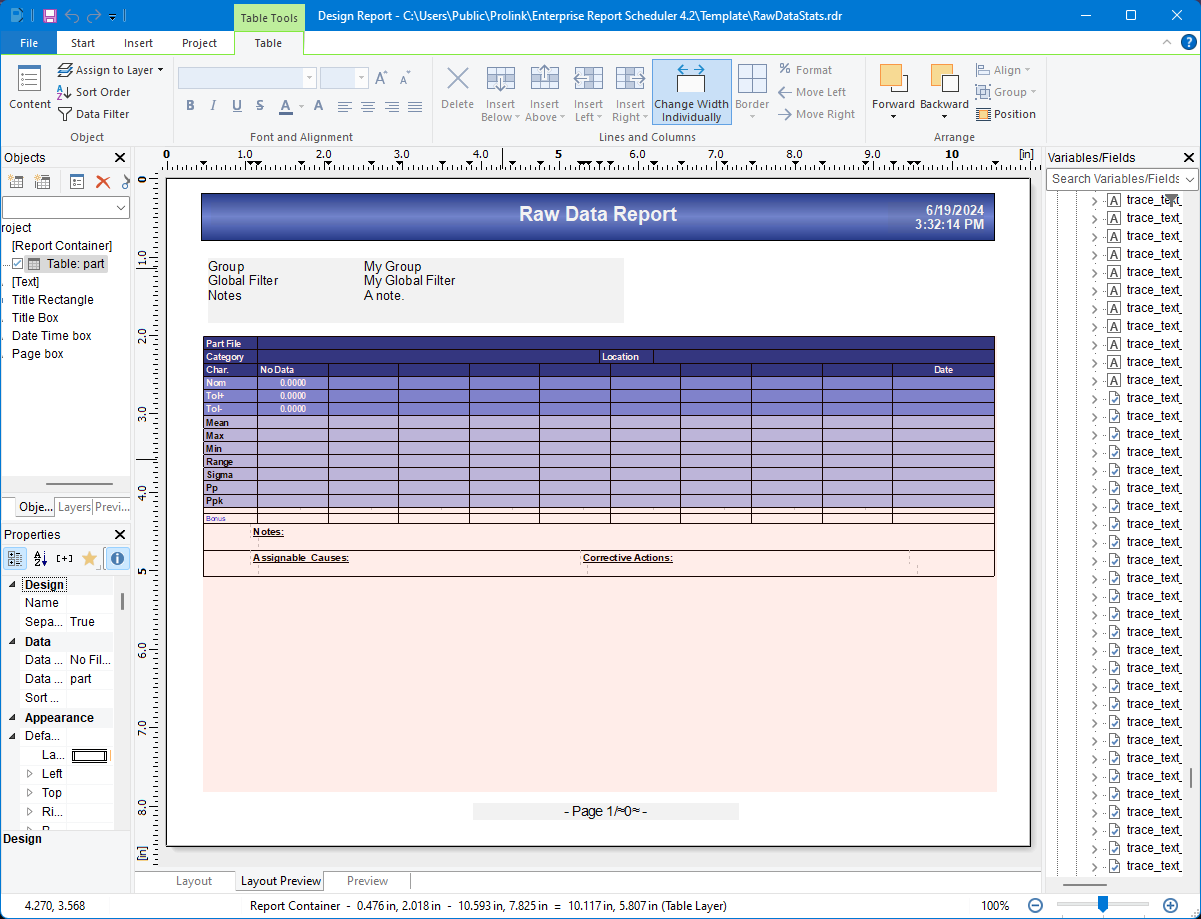
- Go to File > Save As to save the template file with a new name so you don't modify the original template
- Select the Projects tab in the Objects pane on the top left side of the Report Designer window
- Double-click on the "Table: part" section in the Table of Contents list in the upper left to open the editor window
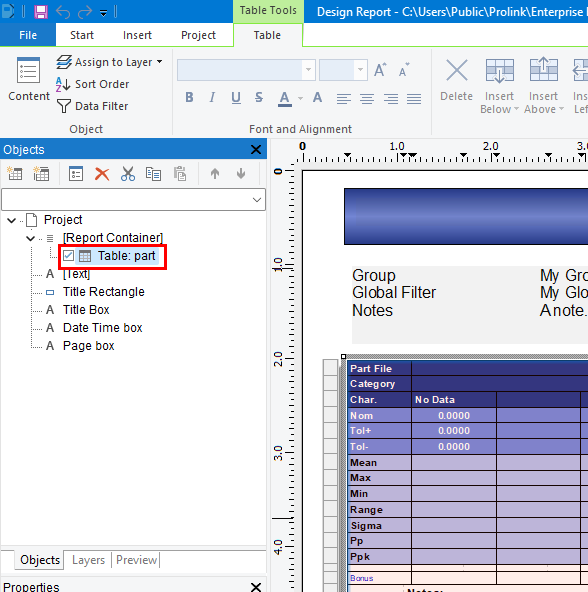
- To change a single column of trace fields you must make two changes, one in the Header Line and one in the Data Line.
- With the "Table Contents - part" window open select the Header Line tab
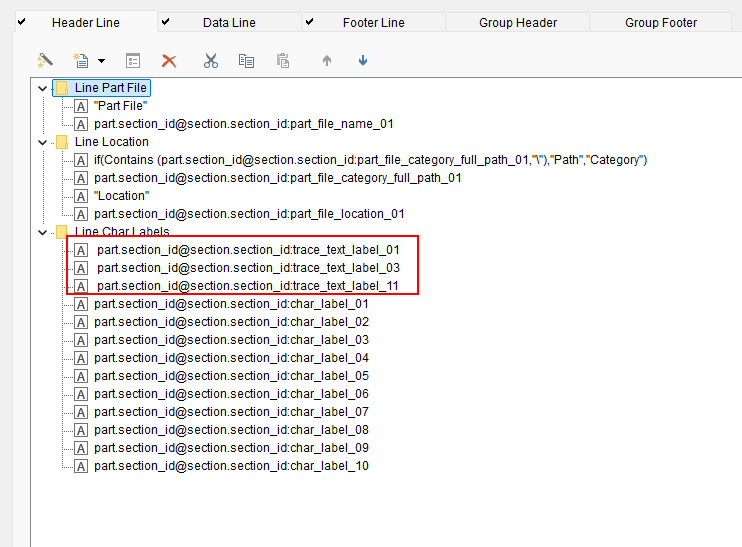
- Notice the lines ending in
trace_text_label_## under "Line Char Labels". These are the names of the trace fields that prints at the top of each column. Let's say text trace field 01 is Serial Number in your data but you want to see Operator (text trace field 03) in that column, instead.
First, double-click to edit one of the trace field lines and that will open an editing window.
- Change the 2-digit number on the end to the value you need based on what you saw in QC-CALC Real-Time (steps 1-3)
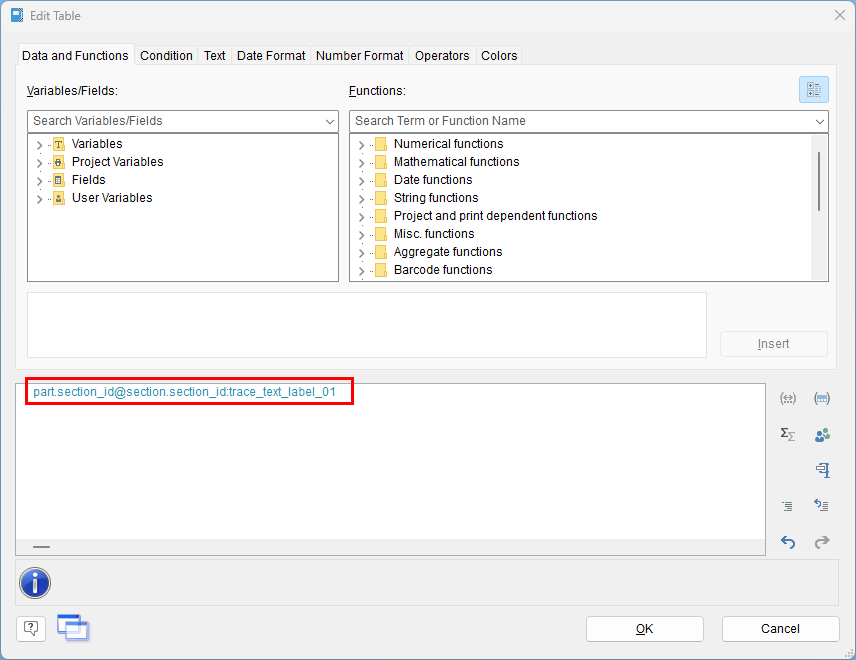
- Select OK to close the editing window when finished.
- After making the change to the Header Line click on the Data Line tab
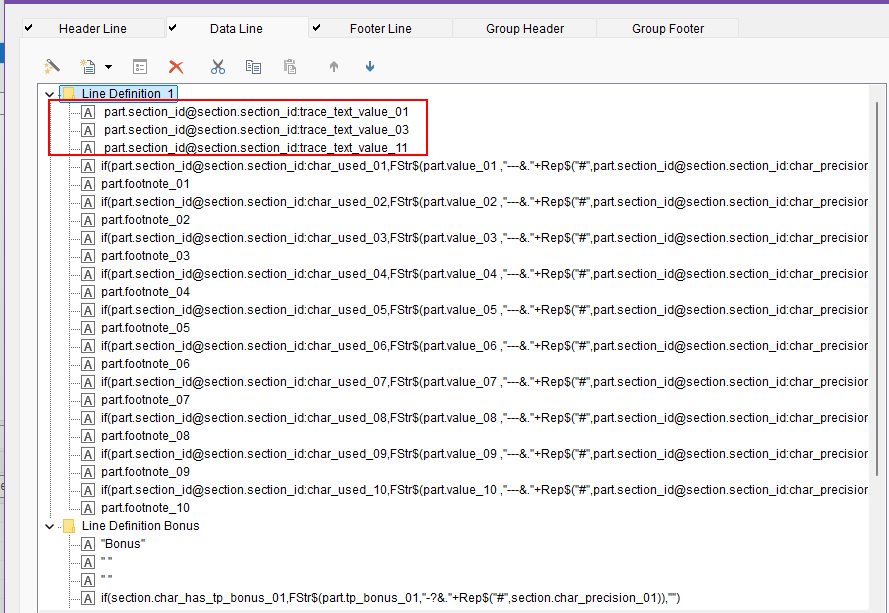
- On the Data Line, you'll need to make the same change to the same trace field line. Notice the formula is the same except the variable being used is
trace_text_value rather than trace_text_label. This is what will print the values for your trace field.

- Once finished, select OK to close the editing window
- Back in the main window of the Report Designer, go to File > Save or click the
 button to save your template
 - You can now close out of the Report Designer and then go to Report > Print Report to select your Raw Data template and print a report.
