Linked Trace Fields were added to QC-Gage 4.3.22. Linked Trace Fields enable a QC-Gage user to set trace field values that are associated with a master trace field value.
An example is when a QC-Gage spec plan has a Lot Number trace field uses the same value for its Site and Material trace fields. Using Linked trace fields, the user can configure the spec plan to set the Site to Farmington and the Material to blue onyx every time the user enters 123abc as the Lot Number trace field.
How to Define Master & Linked Trace Fields
- Create or Edit to run the QC-Gage spec plan wizard.
- Go to the Trace Fields screen.
- Add or Edit a trace field.
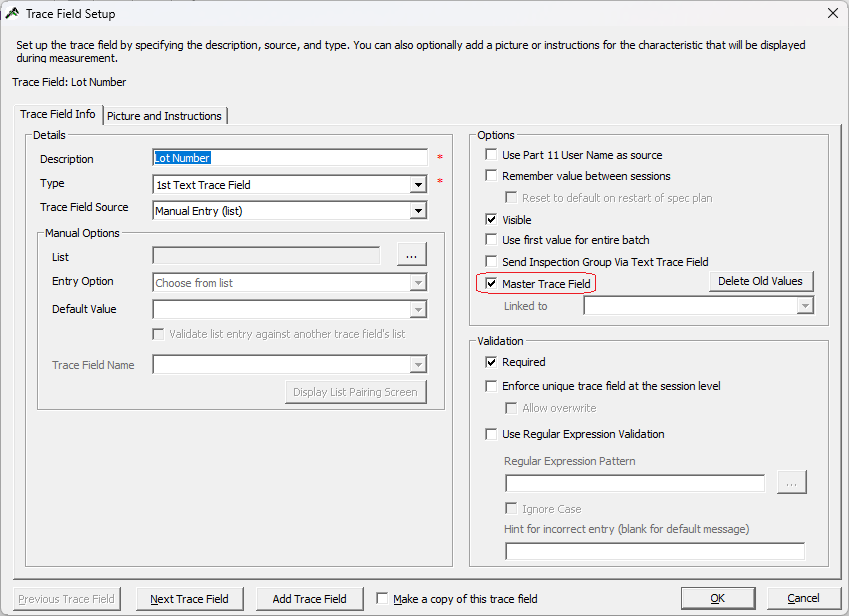
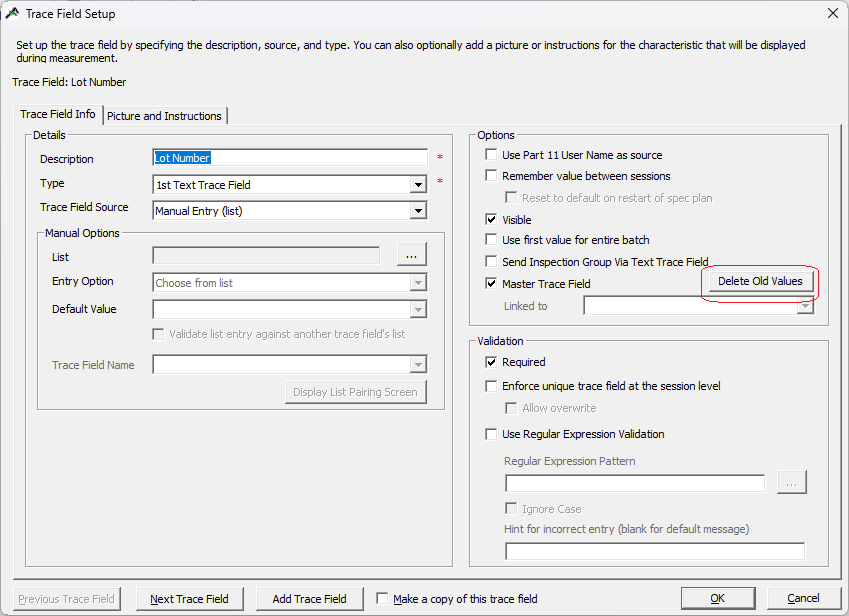
- To define a Master trace field, enter the attributes for the trace field and check the Master Trace Field checkbox.
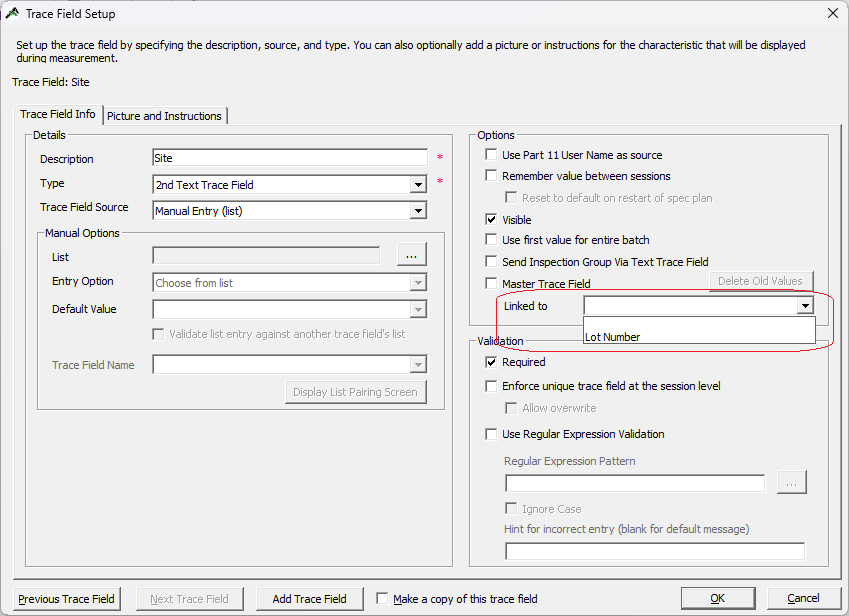
- To define a Linked trace field, enter the attributes for the trace field and select a Master trace field to associate it with from the Linked to drop down list.
- Click OK to save the trace field change.
- Finish the spec plan.
How to Use the Linked Trace Fields
- Run the spec plan.
- Enter data collected for the trace fields and characteristics. If this is a new value for the Master trace field, then you need to enter all the values.
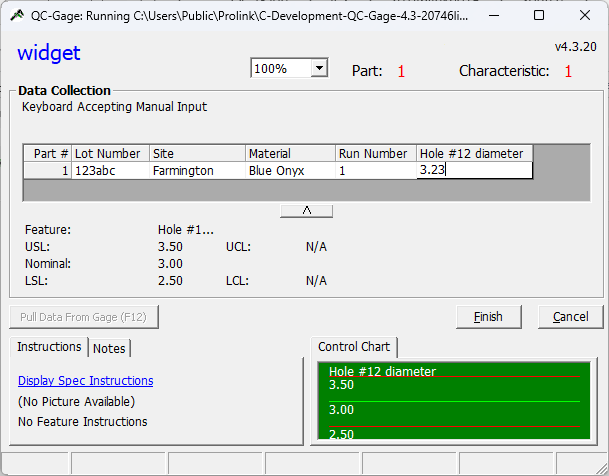
- Click the Finish button.
- The next time that you enter the Lot Number of “123abc”, the Site and Material fields will automatically be filled with the associated values of “Farmington” and “Blue Onyx”.
Note: Master trace field values are case sensitive. Consequently, “123abc” is NOT the same as “123Abc”.
How to Delete Old Values
When a Master value is no longer needed or if you want to associate new Linked values with a Master value, then you need to delete the old value.
- Edit the spec plan.
- Go to the Trace Fields screen.
- Edit Master trace field.
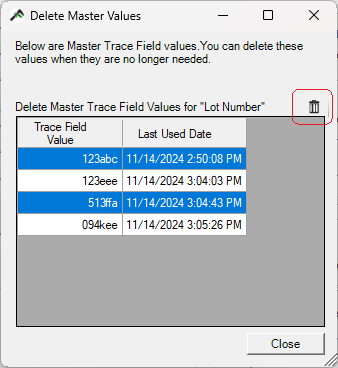
- Click on the Delete Old Values button next to the Master Trace Field checkbox.
- Select row(s) and click the Delete button (trash can) to delete the selected row(s).
