Download and install Prolink License server (PLS)
- Visit the Downloads page: https://www.prolinksoftware.com/download_list.aspx
- Under Current Versions you'll find a link to download Prolink License Server v.4.20.
- install PLS. It does not require a license.
- After installation, right-click the PLS icon and choose Run as Administrator.
NOTE: The PLS application must be run as an Administrative user so that it has access to the ProlinkLicenseService Windows Service. If you do not run PLS as an Administrator you will be unable to activate/deactivate licenses!
Get your Company Code from the Prolink Software website
- Login to https://www.prolinksoftware.com
- Go to Account > Prolink License Server (under Owned Products).
- Under Company Code select the entire company code, right-click, and choose Copy. You can expand the text box using the mouse if it's too small to select the entire company code.
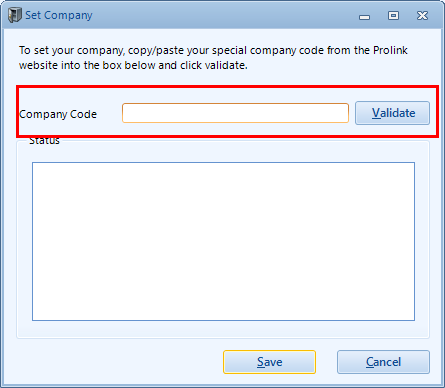
- In PLS, go to Home > Set Company.
- Paste your company code into the box and click the Validate button.
- Now that your company been linked, click the Refresh button to download your license information from the website.

Current Status area
The Current Status area to the right of the list of licenses gives you an overview of the health of the application. If any of the statuses are in yellow or red this indicates an issue.
Status | Diagnostic Function |
Company | Is PLS linked to the customer's company using a Company Code? |
Listening | Is the PLS service up and listening for incoming licensing requests? |
Port | The TCP port number of the web services port used to communicate between PLS and client computers |
Web Status | Is PLS online and able to communicate with the Prolink Software website? |
Update Status | Is the PLS application up-to-date? |
NOTE: The web services port must be open on both the server and the client machines in order for PLS to function.

Activating/Deactivating Prolink Software with PLS
The example below uses QC-CALC Real-Time, but the process is the same in all Prolink applications.
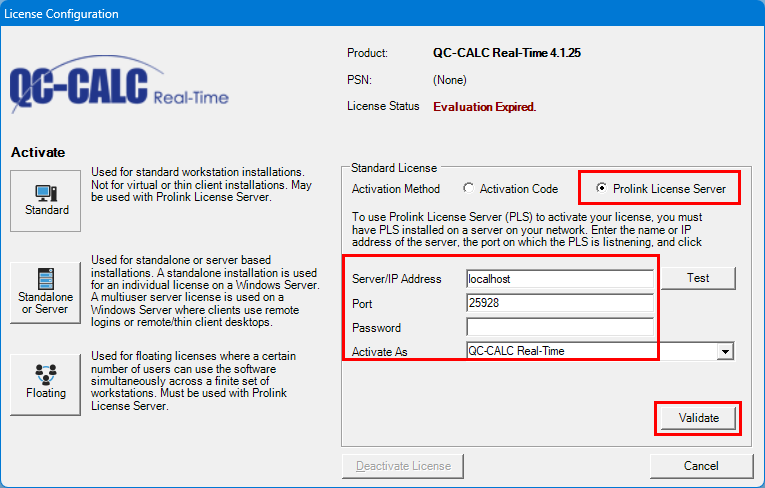
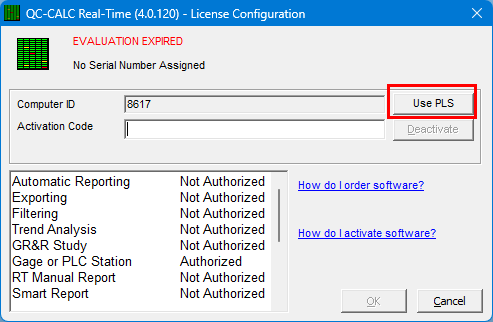
- Go to the Help > License Configuration menu.
- Select the Use PLS or Prolink License Server option depending on your software version.
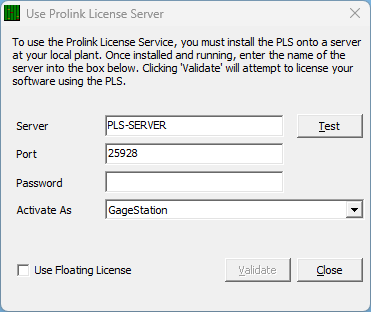
- Enter your PLS server information in the boxes that appear.
- (Optional) Use the Test button to confirm the server information is correct and the server is accessible.
- Select the product to activate if you are presented with multiple options.
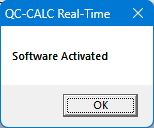
- Click the Validate button to activate the software.
QC-CALC Real-Time v.4.10 License Configuration window and PLS activation process:
QC-CALC Real-Time v.4.00 License Configuration window and PLS activation process:
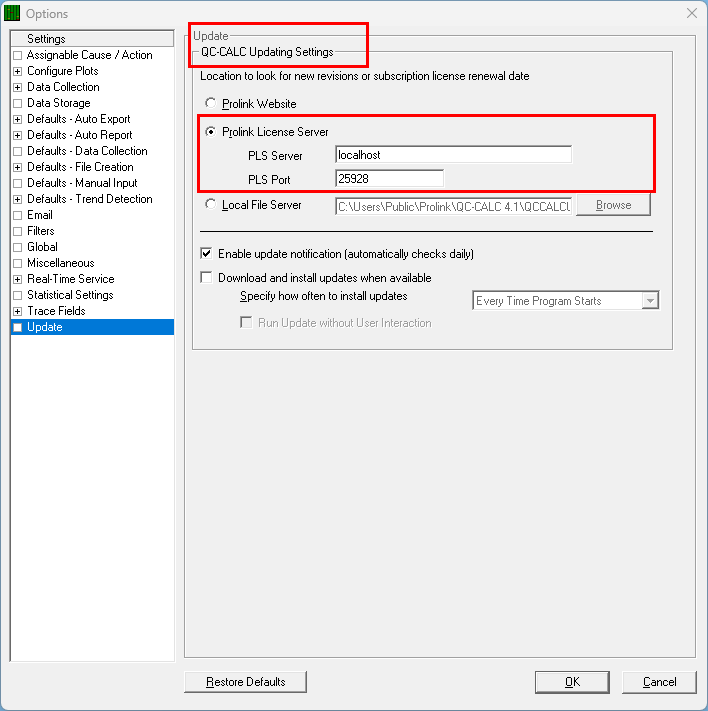
Configuring QC-CALC to use PLS for software UPDATES
PLS can also manage updates of Prolink applications, downloading them from the Prolink website when new releases become available. You can set each Prolink application to ask the PLS server for software updates instead of asking the Prolink website. In the example below, we use QC-CALC Real-Time but the steps are similar in all Prolink applications.
- Go to Tools > Options > Update
- Set Prolink License Service as the "location to look for new revisions".
- Enter the name of address and port of your PLS server in the boxes below.
- Click OK to save the settings.
- Now when you go to Help > Run Update menu, QC-CALC will ask your PLS server for the update installer if an update is available for your product and version.