Auxiliary files such as Admin Tools User Group settings files (.adm file extension). Assignable Cause files, Corrective Action files, the Part 11 User Info file (Part11Users.ini), Reason Code files, and QC-Gage Quick Launch Assignments must be imported using the QC-CALC Part File Utility's Import Auxiliary Files function. This will involve up to 6 separate processes, one for each of the 6 file types listed above.
If you do not use Administrative Tools or Part 11, you only need to import your Assignable Cause and Corrective Actions files this way. If you don't use Quick Launch Assignments in QC-Gage then you also don't need to import those.
- In QC-CALC, go to the Help > Launch Part File Utility.... menu.
- You can also find a shortcut to the Part File Utility in the Prolink folder in your Windows Start Menu
- Select the Import Auxiliary QC-CALC Files button.

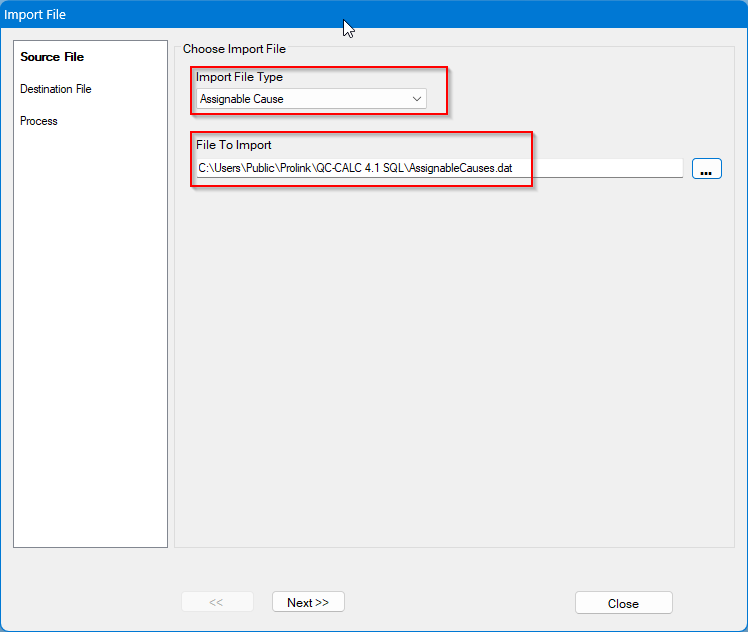
- On the next screen, choose "Assignable Causes" for the Import Type, then choose a File to Import and select the AssignableCauses.dat file you need to import. When finished, select the Next >> button to continue.
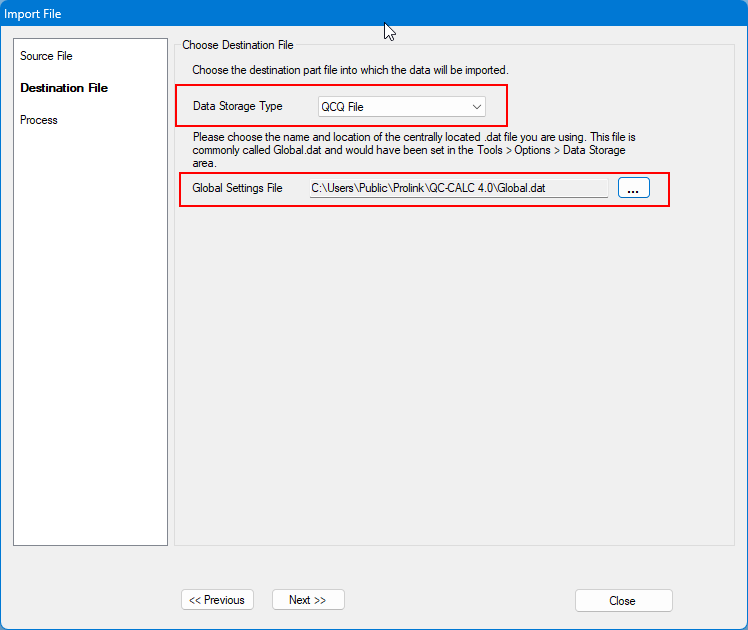
- On the Destination File screen choose the Data Storage Type (QCQ or SQL Server). This should match the Data Storage Type setting in Tools > Options > Data Storage (there, QCQ is called "File-based").
- If you choose QCQ you will be presented with the screen below.
- Choose the Global Settings File (global.dat) where your Assignable Cause data will be stored. This is found in C:\Users\Public\Prolink\QC-CALC x.x) by default but it could also be stored on the network (where 'x.x' is the old version of QC-CALC). Select the Next >> button to continue.
- If you choose SQL as the Part File Type you will be shown the screen below. Enter your SQL server connection information or choose an install of another Prolink product to import the connection information from and then click the Copy Connection Info Below button.
- It is recommended to test the connection using the Test Connection button before clicking the Next >> button to continue.

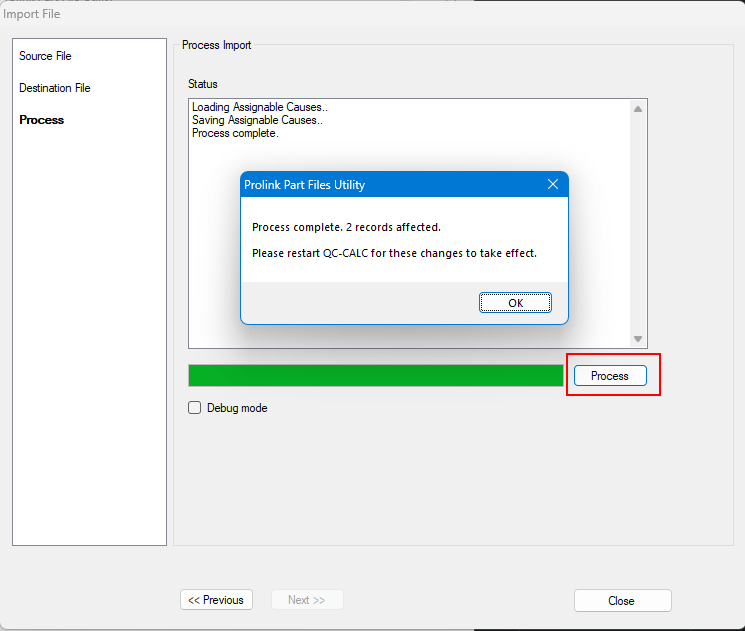
- On the Process screen, select the Process button to convert your Assignable Causes data to the data storage format you selected. The Part File Utility will confirm when the process is complete, as below:
- You must repeat steps 1 - 9, but change the Input Type in step 3. After converting your Assignable Causes, convert your Corrective Actions (CorrectiveActions.dat).

- If you are using Administrative Tools User Groups, those also need to be loaded into the database.
- Go back to Help > Launch Part File Utility... and select Import Auxiliary Files.
- Choose "Admin Tools User Group Names" as the Import File Type, and then provide the folder where your Admin Tools files are stored. Select the Next >> button when finished.

- On the next screen enter your SQL server information or use the Copy Connection Information button to copy the connection information from another Prolink application such as QC-CALC Real-Time. Select the Next >> button when finished.

- On the last screen, click the Process button to load your Admin Tools User Groups into the SQL database. The Status window will indicate when the conversion process is complete, as in the pictures below.

- If you are using Part 11, you must also convert your Part 11 User Info File (Part11Users.ini). Repeat steps 1-9, selecting "Part 11 Users" as the Import File Type.

- If you are using Part 11 you must also convert your Reason Codes file (reasoncodes.dat). Repeat steps 1-9, choosing "Part 11 Reason Codes" as the Import File Type.
- If you use Quick Launch Assignments in QC-Gage, you must convert your Quick Launch Assignments. Repeat steps 1-9, selecting "Quick Launch Assignments" as the Import File Type.